Hehehehe... that song... this post... it was just too perfect sorry. I don't even know if I've ever heard more than a couple of line's of that song actually, so please don't hold me accountable to the smuttiness of it! lol!
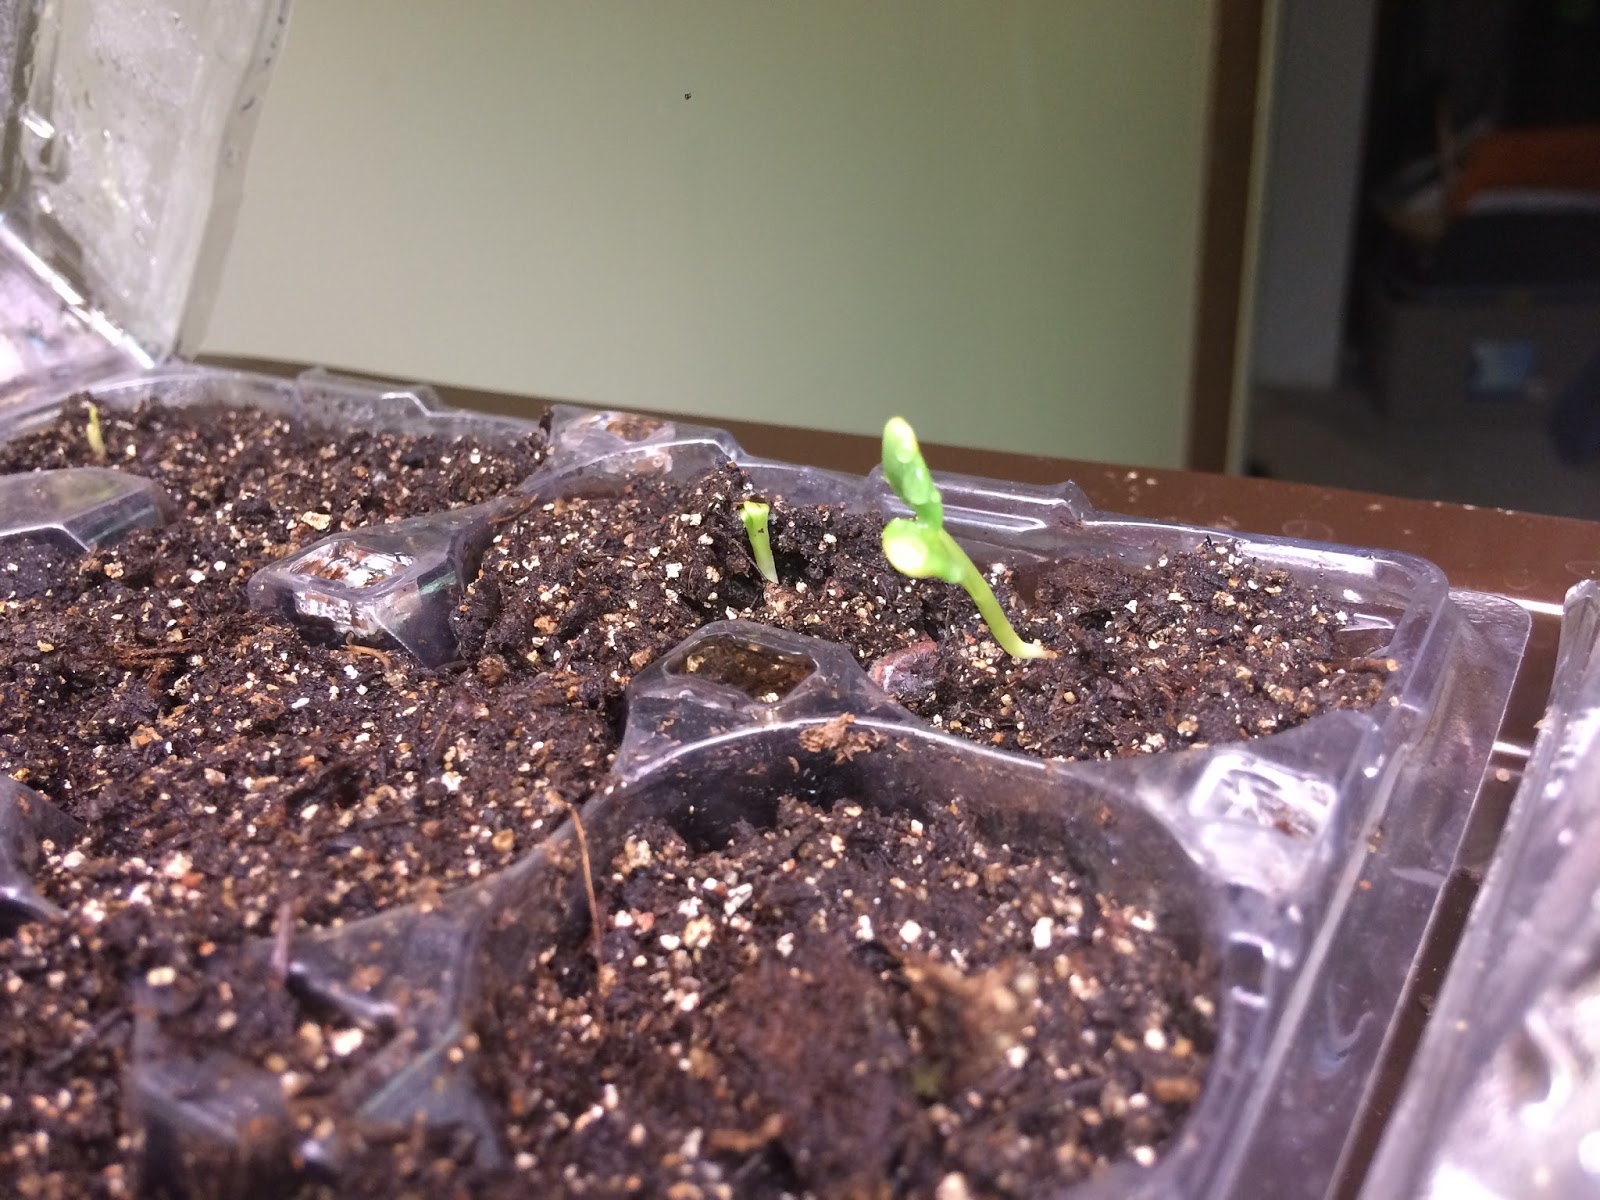
But this week has been very busy! So much to post about in the spring time!! :) Some of my stuff has sprouted... The tobacco has sprouted, a couple of rhubarb seeds have sprouted, and suprisingly, MOST of my jalapino peppers!!! :) I did a little research that taught me that peppers require hot-and-cold for germination. AKA, they stay dormant until there's heat in the day, and cool at night. So with a hotter bulb, I was able to accomplish this simply by shutting off my lamp at night. It only took like 3 days! :) I'm thinking I'll be doing a bit of transplanting yet this week, for peppers and maybe some rhubarb, since the sprouts are pretty big. Here's some photos I took this morning! :)
 |
| Jalapino seeds: planted Feb 26, photo march 5 |
 |
| Ground cherries: planted Feb 26, photo March 5 |
 |
| Ukranian Rhubarb: Planted Feb 22, Some germination, some rot. Must be old seed. |
 |
| Manitoba Rhubarb: Planted Feb 26, just beginning to germinate |
 |
| Tobacco seeds: planted feb 26, photo March 5 |
 |
| Snap Dragons: planted feb 26'th, only sprouting on the one edge so far |
Now... MILK JUGS! I need to explain my terrible joke of a title now. I found a couple of sources (like
this one and
this one) that talked about starting seedlings in a northern or cooler zone climate, but putting them in milk jugs, and setting them outside to freeze-thaw-freeze-thaw all spring long! :) I decided to give it a shot! (with cheap seeds... but seeds I know germinate well)
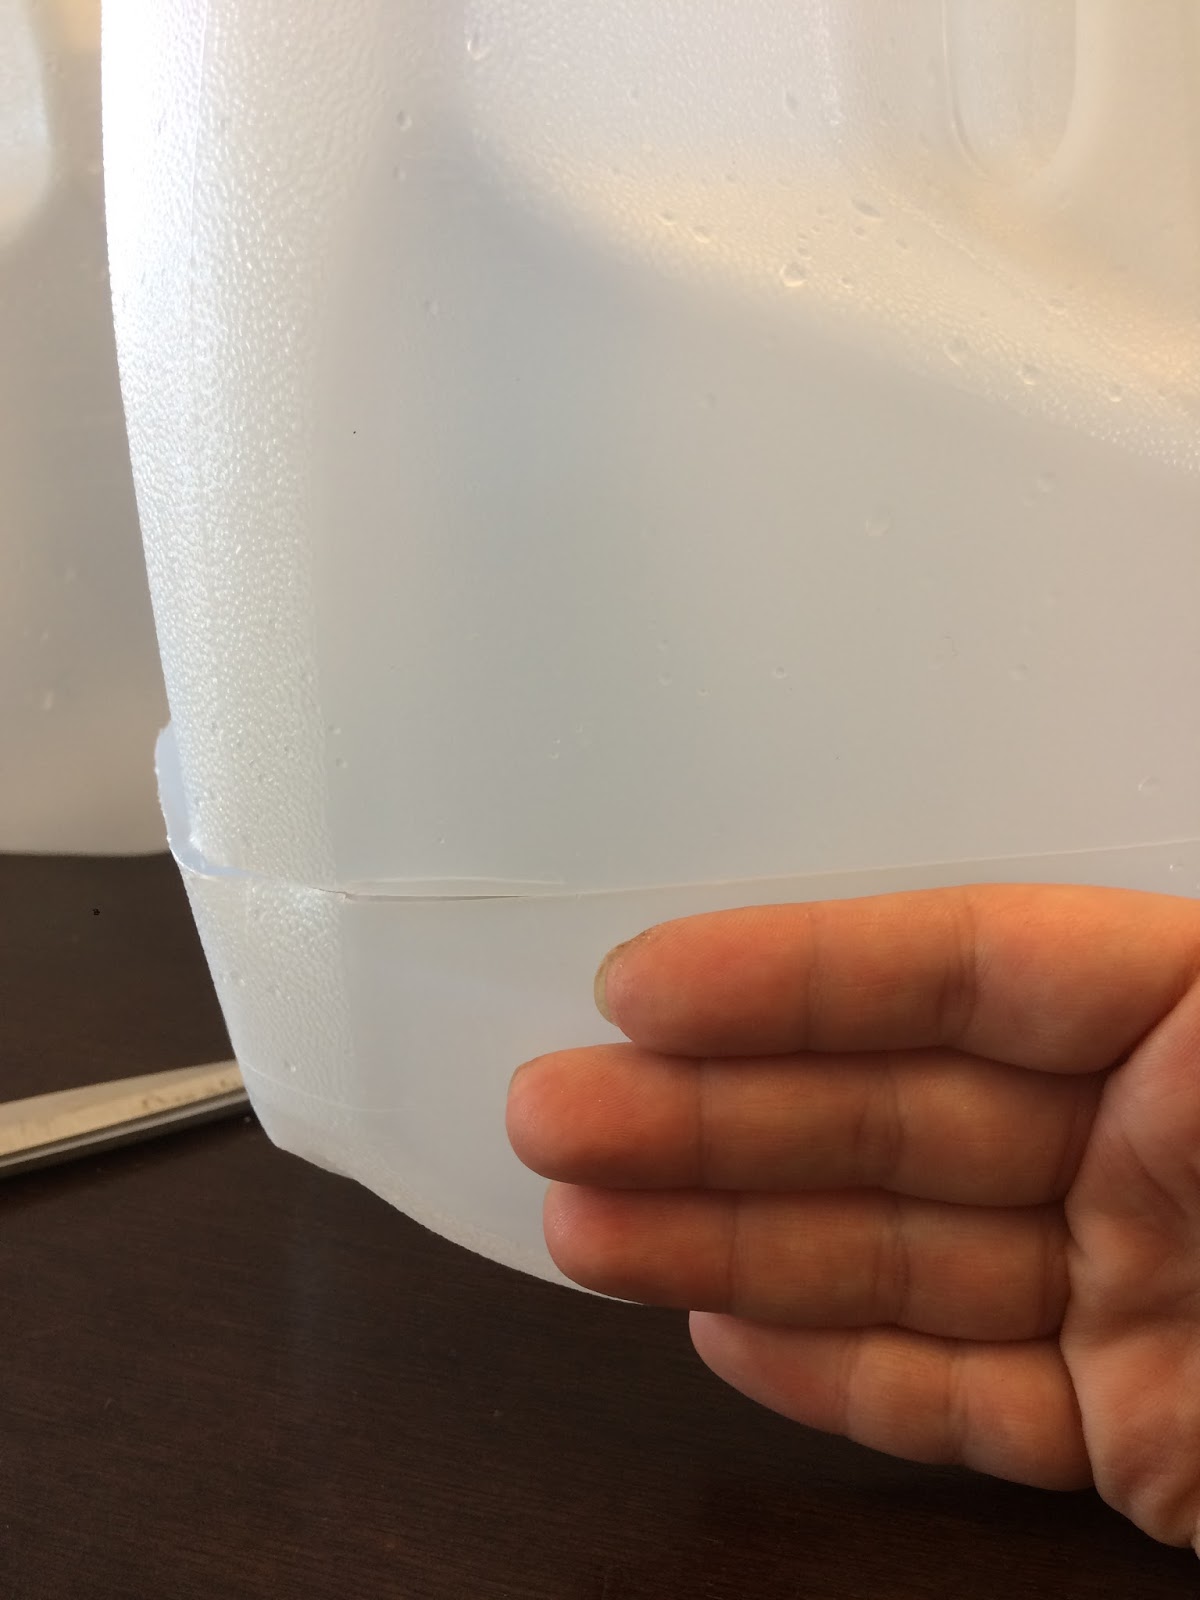
I managed to collect 5 milk jugs between myself and my local mom's group that I attend with only a few day's notice, so I've already got a good start on this! Though my plan is to get a few more this week yet to add to my experiment! :) Anyways, Wash and drain the milk jugs, and remove the stickers (if you pull very slowly, they come off pretty well).
Next you want to cut a ring around the bottom. Not too low, you want it to be high enough to hold your dirt and sprouts! :) I did about 4 fingers tall as seen above. Leave a little chunk of the jug uncut, so you have a nice hinge to keep it together.
Next, The jug needs holes for drainage. You can just use a knife or scissors. I had a child's wood burning tool handy, so I just melted holes into it.
Top and bottom, about 6 or 8 holes on each end. I chose to leave the milk lids on the jugs, but i dont think the other bloggers did that. I have them so I kept them. Maybe I'll remove them as the weather warms up, for heat escape.
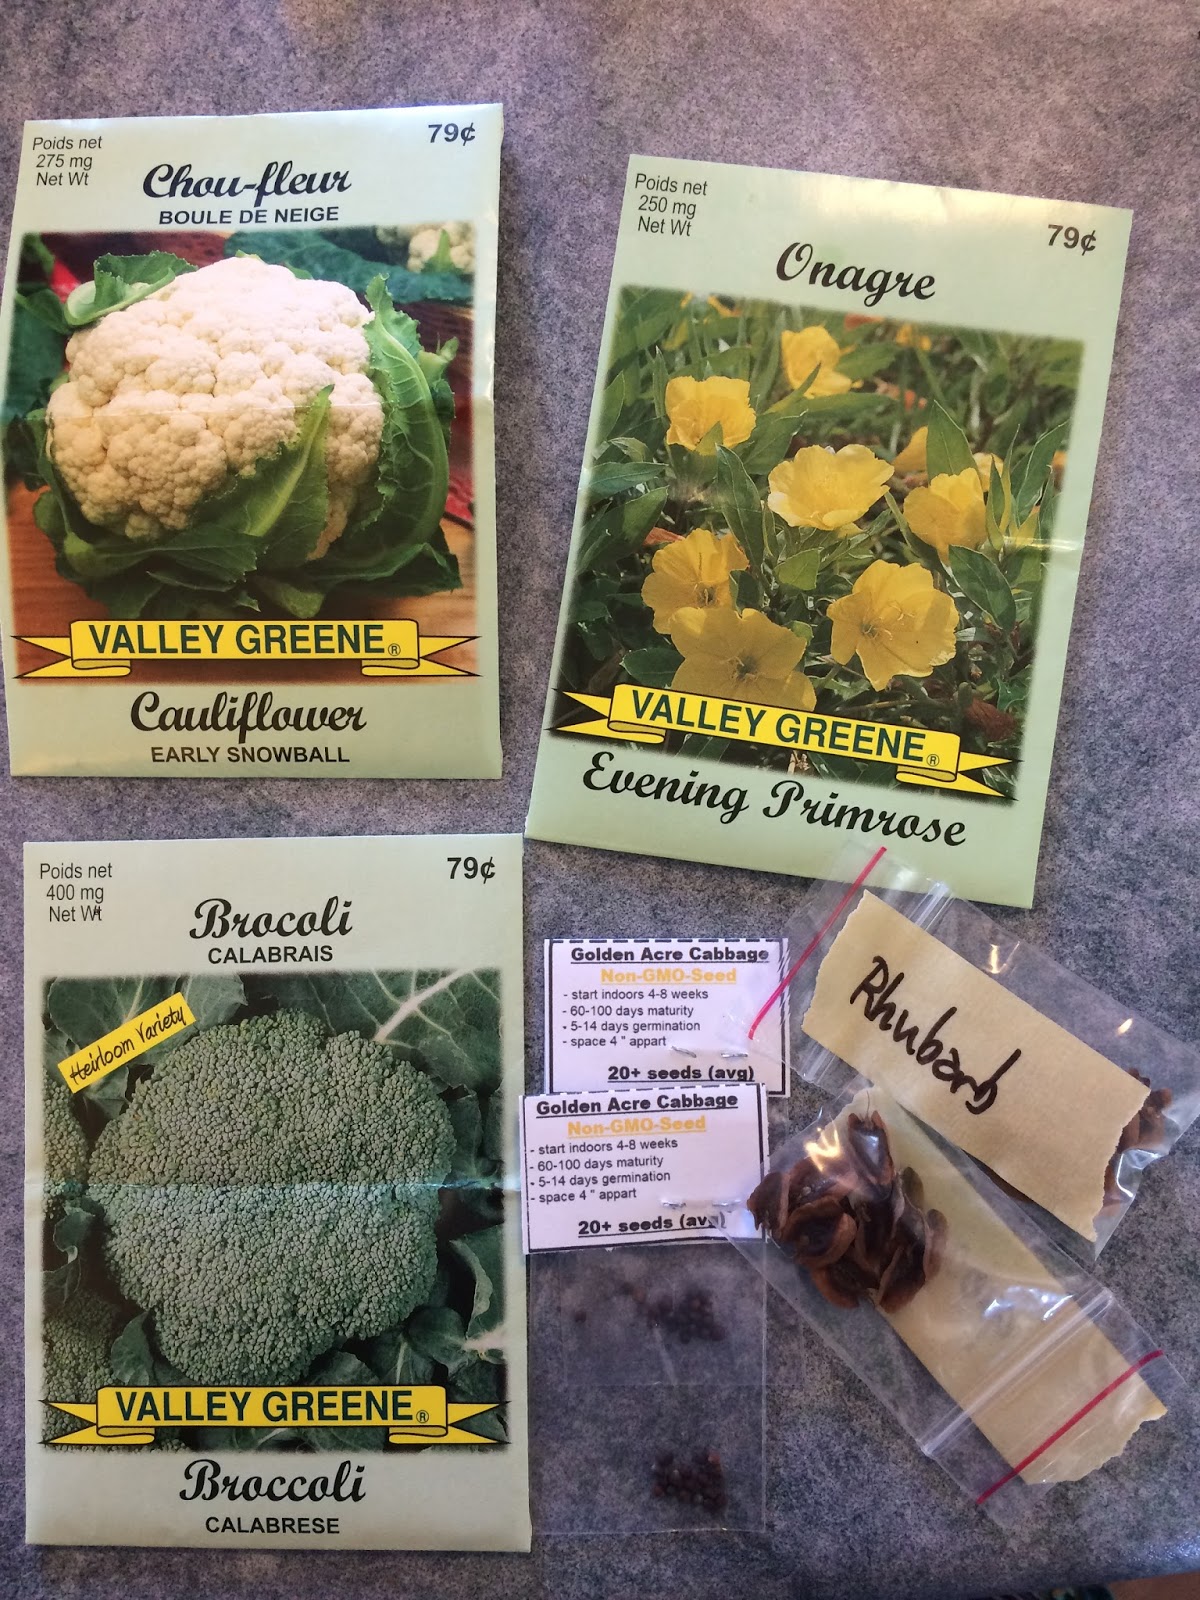
When choosing seeds to plant in a cold spring, choose seeds that like cold weather! Don't do tomatoes or cucumbers which are very sensitive to any frost. I saved a few rhubarb seeds to try out this method, since it's a cold weather crop anyways. And then my brassicas which are broccoli, cauliflower and cabbage. I also am trying evening primrose, because I've been told their seeds need extensive stratification (refrigeration and thawing several times) to start indoors. So starting them in a milk jug seems to just make sense! The purchased seed bags are from dollar tree. 4 pks/$1.25 super cheap, but excellent germination rate!
Mix up your dirt! In this case, i'm doing a proper "mel's mix" which is equal parts peat moss, vermiculite and compost, since the seeds will be growing here for a while, and it should mimic seeds being in the ground.
wet the soil, saturate even. Remember soil starts out sopping wet in the spring time from the snow. I used cold water, not warm. I dont want to awaken the seeds before mother nature wants to. So cold water it was!
And then I loosely tumbled dirt into the jug without packing it down. Roots need lots of oxygen in the oil to grow well. and since these wont get a transplant in for quite a while, this makes the most sense to me.
I laid out my seeds on top of each jug just to locate them. and then I started sewing them. I sewed them pretty dense since this is experimental, and I'm assuming even if it's successful, that only the strong survive. So lots of seeds, will help ensure that (if this is doable near Winnipeg) some will germinate!
I labelled the jugs in 3 spots. Once inside the jug (the number 1 is for my date-referencing if I do a subsequent sewing. The second sewing would have a number 2 on it). Once underneath the jug handle, and once on the very top of the white part, where the holes are. Rain, snow and heat will all try and ware away the lables, so I'm hoping by having it in 3 places, i stand a chance of knowing what things are! :)
Next just close them up and tape them shut! :) one blog I read, they just taped a tiny piece to tack it shut. The other blogger, used duct tape around the entire seam to seal it up. So I did something in the middle and tacked all the corners shut... it's got holes in it anyways, I'm not sure the open cracks will make a huge difference.
and lastly, find a sunny sheltered corner to let them sit! The greenhouse affect wont work unless the jugs are actually getting sunshine. And you want shelter from wind so they don't knock over.
You may notice our seed jugs are inside a dog kennel... that is because we have a dog! lol! We only used this for crate training when he was a puppy, so lucky for me, my seeds can be both close to the ground, and protected from our dog inside this kennel! and there's room for plenty more.
And here we are, 1 week later, with a huge dump of snow! Exactly how it's supposed to be done. So next year i'll be waiting for our little Chinook again to start these jugs, and let them freeze and thaw, freeze and thaw... i'll keep you posted on whether this works or not! :)
Until next time, keep those thumbs green! :)


Good Post. Hope they work. I have never thought of jugging it. LOL but I will save my jugs for you. Enjoy all the snow that we just got.
ReplyDeleteThanks! :) I hope so too! One of the other bloggers reported that her milk jug seedlings appeared stronger and healthier than the ones she started under lamps indoors.
DeleteWould love to hear how the milk jugs are doing?
ReplyDelete