Just a disclaimer. As I said last week, my posts on weeding are based on personal experience, and not from a textbook. So feel free to comment and correct anything! :) I find hands-on-learning more useful in most settings. And what my Grandma taught me more practical than college learning! So that's the direction I tend to sway in when it comes to gardening. (Medical practice... I may change my views a little lol!)
Today We are going to get down to some of the nitty gritty details of weeding. we're gonna talk about how to get'er done, and hopefully done well! We already discussed last week what a weed is, and when we should be weeding, and why we should weed. So today we are talking more about the "hows" of weeding. :)
TIP 1: GET TO THE ROOT OF THE MATTER!
First and most important when it comes to weeding, is that you strive to pull out the ENTIRE plant of the weed. This isn't always possible. But hopefully a few of these little tips will help!
1)
Don't pull by the leaves: The leaves of the weed are the most tender part. So when you are pulling it out, if you pull the leaves, you'll just simply cause the plant to break off at it's weakest point. Usually leaving the roots fully intact, and able to re-generate a nice new weed for you in less than a week's time! No... You want to get as close to the ground as possible when pulling a weed. Usually theres a couple milimeters of the stem right at ground level that is kinda-like a transition-stem between green soft stem and tougher root material. This is where you want to ground your fingers when you begin your pull.
2)
Don't pull too quickly: Weed's aren't band aids, so don't rip them out fast. Fast pulling will usually just result in snapping the stem. Remember you need the soil to give a little. If you punch a pile of sand fast, you'll hurt your hand right? but if you slowly press down on sand, your hand will sink into it. Soil works much the same way. Once you've grounded your fingers on the weed, start by just making the stem taut. Then apply only a SLIGHT amount of pull to it. you should begin to feel the roots slip out of the soil. As the roots start to come, you can pull more. But if you just YANK it quickly, you'll simply break the stem at soil level.
3)
If you missed it, then dig it!: If after this (and the below) technique the plant still snaps, start digging in the soil with either a trowel or butter knife and attempt to pull out as much root as possible. usually a decent amount of root damage done on a hot day will be enough to kill it off.
4)
Leave it for next time: If you still cant get the root, sometimes you just have to count your losses, and bank on having to give it another go when the weed springs up again. Sometimes the first shoot is just so tender that there's no way to get it's roots. But when it springs up again, the stem is tougher and the roots come easier.
TIP 2: WEED AFTER WATERING!
After you water your plants (a good soaking or a good rain) the soil is MUCH softer. This is so SO SO important when weeding! When the soil is softer, the roots will come out much easier. It's the difference between mud and a brick of dirt that can make-or-break your weeding experience. Pulling weeds out of dry soil is almost impossible unless your garden is comprised of a professional soil mix with peat moss and vermiculite/perlite in it. If it's any kind of manitoba soil, it's either got hard-packed sand, or clay matter to it. When clay dries, it's solid. when it's wet, its simply goo. So go ahead and give your plants an early morning soak and get in there! :)
 |
| notice the color difference between the watered area and the dry area. One is soft soil to pull weeds, one is brick hard. |
TIP 3: DON'T WEED TOO EARLY!
When a tree seed has barely sprouted above the ground, there is almost zero chance of pulling out the root. You need a weed to be tall enough for you grab the stem BELOW the leaves. Otherwise there's very little chance of getting it's roots. This can be tough to wait for sometimes. Especially in a flower bed where esthetics is the primary objective. But in my experience. premature weeding just results in re-growth almost immediately. So waiting a few days after the poplar fluff has sprouted will produce a more permanent weeding result than doing it when there's tiny green fuzz-leaves on the ground.
TIP 4: DON'T WEED TOO LATE!
I know, I contradict myself lol! But waiting until a weed is too big is also a big no-no. First of all, once it has flowered, the odds are it's 100% working on establishing it's roots! That means you'll pull out some garden plants along with the weed, or worse, that weed could become a delightful perennial!! EEP! Dandelions are really bad for this. Also, after a weed flowers, it produces seeds. So you REALLY don't want to leave it that long. An inch or two of growth is usually enough to get the job done but pre-flowering.
TIP 5: DEAD-HEAD IT!
If you have issues like I did with thistles, sometimes you're resorting to round-up which takes a good 2 weeks to kill your weeds. So before you apply anything like that (or if you simply aren't gonna be pulling the weeds out for whatever reason). You must be diligent to look for those flower buds. Pull those off. Don't let the weed flower, or it'll root-down more, and set out seeds. You can prevent one thistle from becoming 50 thistles this way. Same with dandilions.
In my experience, the cycle of weeds goes as follows:
1) quickly germinate as many and as often as possible.
2) thrive in watered areas, and wither in dry areas
 |
| plenty of weeds in my watered rows, but almost nothing on the in-between paths. Because they are dry. |
3) work on root and leaf growth
4) begin a flower stem
5) flower
6) once polinated, make seeds
7) start rooting down for winter.
This sounds like an all-summer seasonal cycle, and for a longer living plant like thistles it is. But dandilions can complete this entire cycle in less than a week as I'm sure you're quite aware. So can many of the weeds found in your compost such as alfalfa and canola. You really want to get those early.
TIP 6: TRY A TWIST!
Once you've been weeding for an hour or so you'll develop a bit of hand-finess for how to pull out certain weeds. But the technique that helps me rip through the task easily is as follows.
Start with a back-handed grab with the right hand
twist the weed about a 1/4 turn to the right or less, and then begin the taut tugging.
in my mind, I imagine this pulling to be similar to what a horse or cow would do with it's tongue when it's pulling the plants out of the ground to eat them. Sort-of wrapping their tongues around the plant first and then pulling.

OKAY! I'm gonna leave it there for this week! Next week I'll touch on a few specific weeds, and some of their specific techniques that I do. My only last urge to you in weeding your gardens... is that... spiders need bigger plants to build their webs in! EEP! If you weed more often, you'll have less spiders and creepy crawlies lurking in there! I never use gloves anymore because I'm confident that there wont be anything lurking in the small weeds I grab.
 |
| this technique works magically on thistles... Stubborn devils that never come out! More on that next week ;) |
NOW LETS TAKE A LOOK AT THE VEGGIE PLOT! I promised you this last post. And boy is it coming along nicely!
a wonderful amount of dill growing from my dollar tree seeds! I planted it in the opposite side of the garden to last year due to the blight!
my basil which I started from seed. It's just about time to start pinching the tops to encourage the plants to bush instead of bolt! :) Especially with the heat we've had.
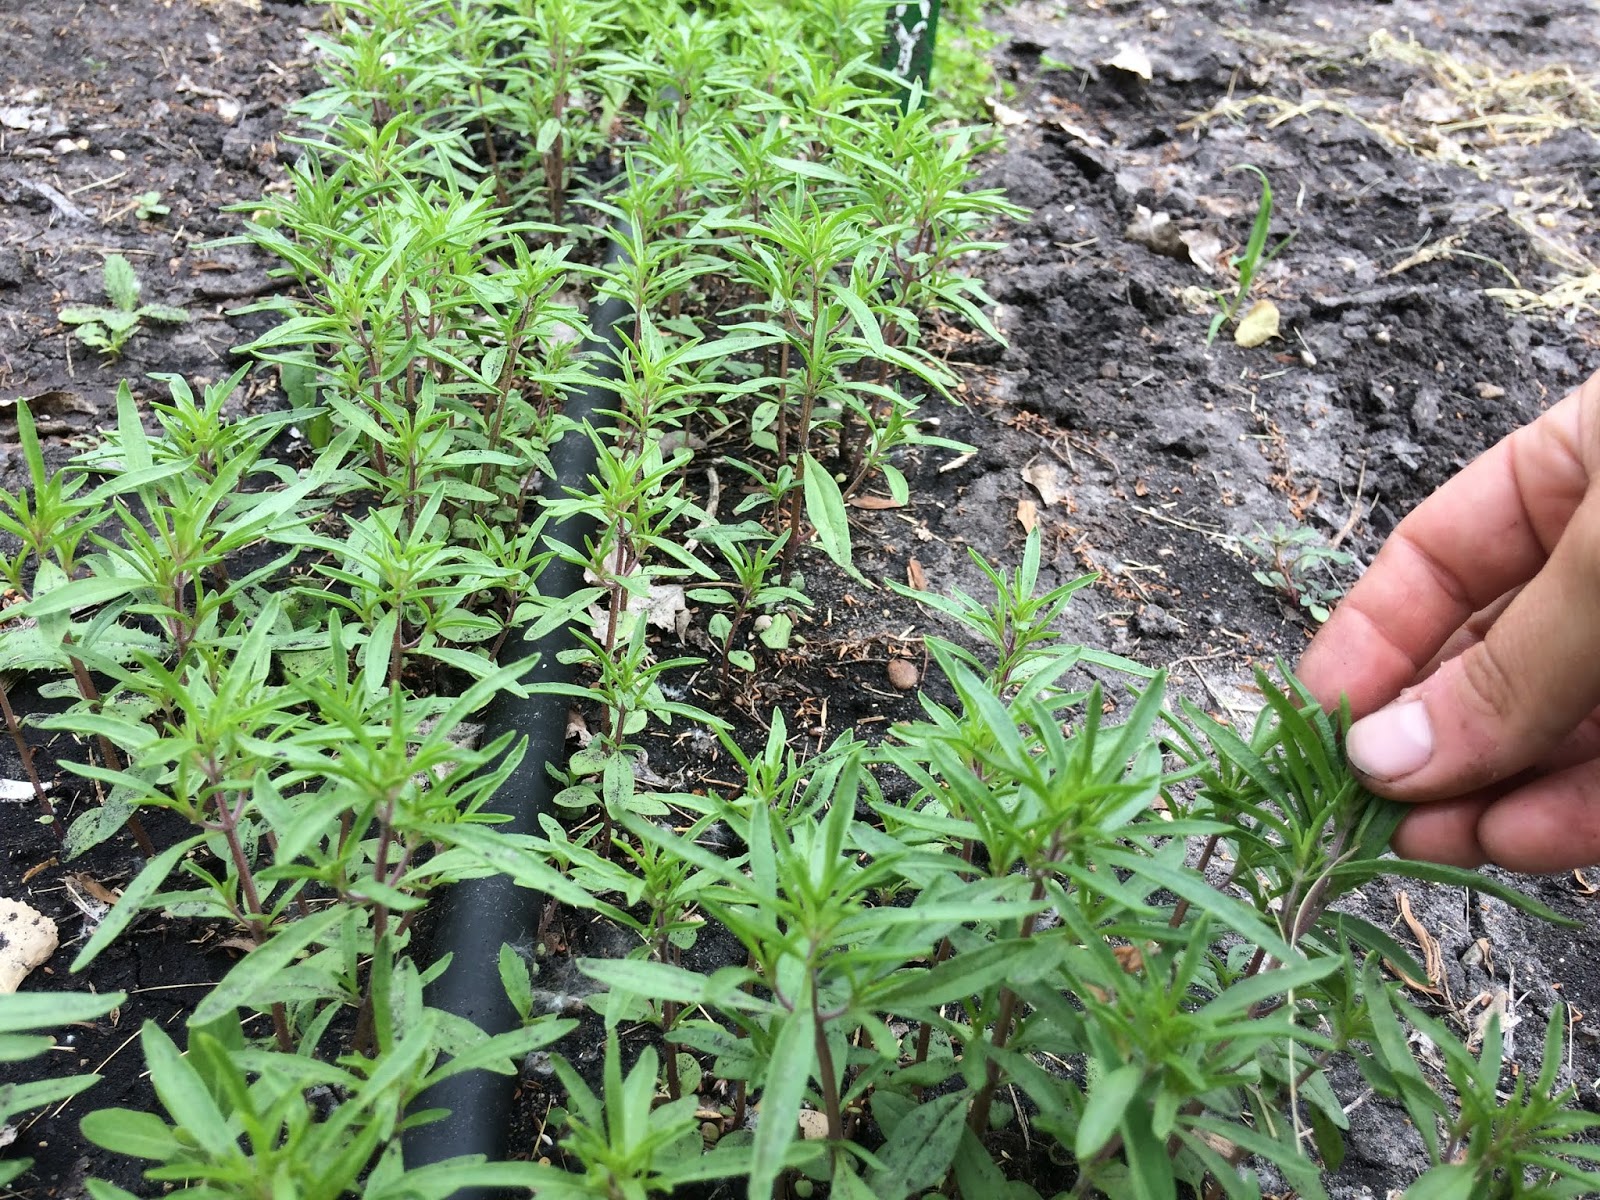
Summer savory! I had to order these seeds from Heritage harvest because dollar tree didn't supply them this year. Worth every penny for summer dishes! :)
Bottom is parsley, top is cilantro!
This one tiny pepper plant is already making me a delightful Jalapino (which I will use for a bacon wrapped jalapino popper!!)
A shot of the rest of the peppers. The plants are indistinguishable at this point as to which ones I started much earlier than the others. However, the one that is baring fruit is one of the earlier seeding. SO that's evidence for me to start peppers earlier than their suggested dates.
my potatoes are doing AMAZING!! These are actually from LAST year's potatos... We harvested and used them till they started going soft, and then I simply forgot about them in the basement... they were quite "sprouty" lol! I layed them down in the ground with their long sprouts. And any trowel testing is showing a solid row of nice big potatoes already. Pretty flowers too!
My corn seems to be doing well. The far end of the row was flooded in some of our irrigation glitches and the plants are smaller as a result (evidence that over-watering isn't good either)
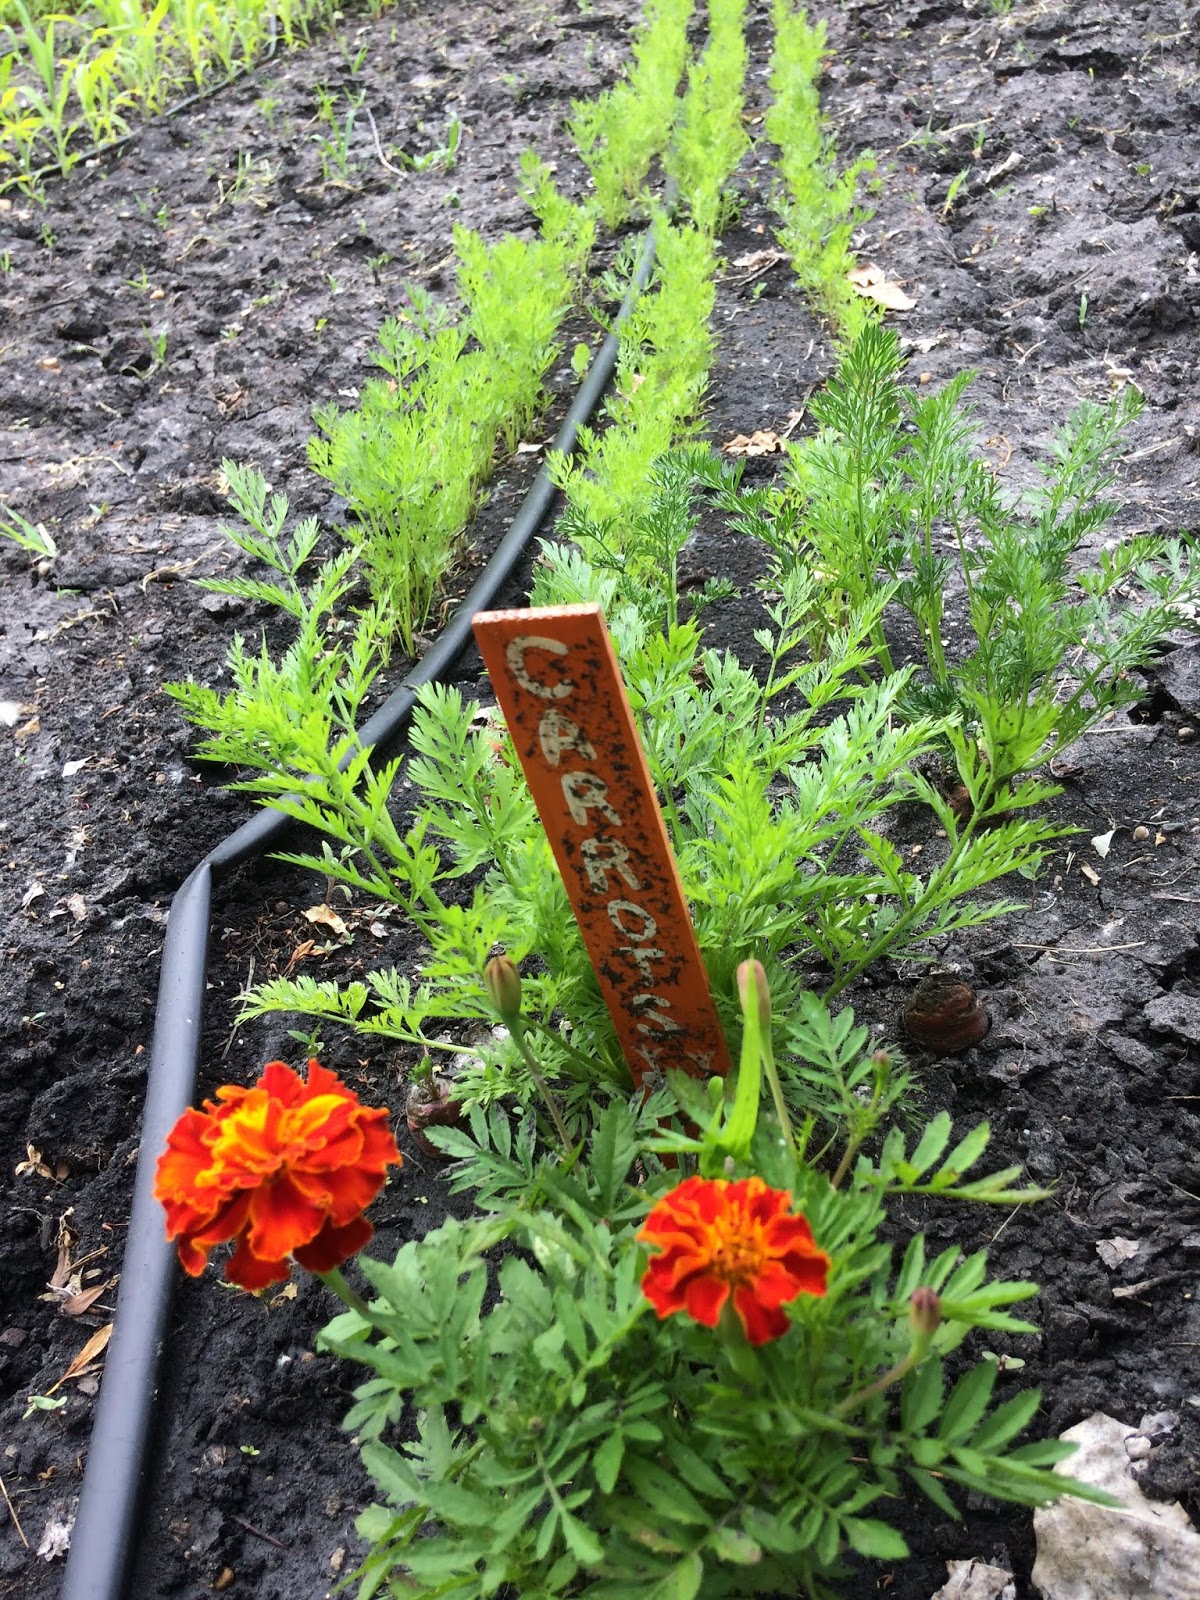
My carrots look beautiful! The big bushes in front are my SEED CARROTS. Sprouting carrots from peak of the market, that I planted in hopes of harvesting some of my own carrot seeds this year :) Carrots are a bi-ennial. I'll talk more on that in the winter time when I do a seed-saving post.
My tomatoes are hit-and-miss. Some are looking pretty spindly like the above. But again, they got flooded in our irrigation mishaps.
and others are looking more lush with blooms starting to form. All are plants I started from seed.
My beets are looking great as well this year! All my root veggies are doing good. Last year I had to re-seed every single root veggie, and I still got almost nothing. There are quirks to every season. Last year it was root veggies, this year it's the crucifers. The plant in the front of the beets is also a beet! it's one I saved from last year, in damp sawdust. I planted it with my seeds. It's "bolting" the way lettuce does when it's done it's season. You can see a flower forming. Hoping for some seeds here too!
Cabbage and borage in a row with each other. Borage is supposed to deter cabbage worm. The cabbages from my milk jug experiments are doing extremely well!! (i'll do a proper milk-jug update in the fall or winter once the growing season is complete and I can fully evaluate my findings).
This was also both cabbage and borage. However the seeds I started in the garden from seed (not milk jugs) did NOT germinate. Cabbage is in the crucifer family.
As you can see, all that's growing in my kale patch is weeds... no kale this year either! Last year I had more kale than I could shake a stick at. I was giving away galon bags full packed as full as possible... weekly!! It was insane! This year, absolutely none at all... Kale is also a cruciferous veggie.
I have re-seeded my Kohlrabi as well... another cruciferous veggie that didn't sprout at all this spring. The reason (in my mind) that this family of veggies is doing so poorly is that they love cool spring weather. Our cold spring days all ended up being between 30 and 36 degrees if you recal. Highly unusual. So despite being watered twice a day and kept moist, the heat was just too much. I love Kohlrabi though, and Heritage Harvest sent me fresh seed free of charge since mine didn't grow (they really are excellent to work with). So my fingers are aprehensively crossed.
Lettuce... doing great! What more could you want!? it's a little bitter this year. Due to the heat again, i'm sure.
My peas are happily climbing!
And they have also started blooming!
The Wpg Harvest grow-a-row peas are doing amazing as well. If you can look at the top left of the photo, for some reason the 4'th quadrant of peas is a full foot higher than the rest! That must have been a different variety of peas or something.
On to the squashes! Its so hard this time of year for me... because I just picture my massive plants from last year! But it's still early. I may also cave and do some hose-watering to flood them a bit and encourage them to trail more. This is spagetti squash! From seeds I saved last year. Doing great! and has a few little blooms.
Two zucchini plants which look healthier now than they did last week. The leaves were paler last week. But now that our nights are staying above 15 degrees, all the squash are happier!
Except my poor watermelon plants... Not sure what their deal is, but I'll let them stick around anyways! We'll see what happens. If nothing grows, I'll forego them next year. Two failed years in a row is enough for me to know it wont do well in our garden.
Pumpkin looks like it'll do just fine this year. Biggest of all my squash vines so far.
Onions are happy. I've been using some of the greens already too. I planted all red onions this year. I dont usually feel the need to grow onions, but the bulbs were wicked cheap, and I have the space... Each tiny bulb turns into one onion. So I mean...the entire row saves me maybe $12 in onions lol but hey! Why not?!
Spinach... my cursed spinach litterally sprouted and bolted. Not a leaf to eat anywhere. BOO THIS HOT SPRING WE'VE HAD!!!!
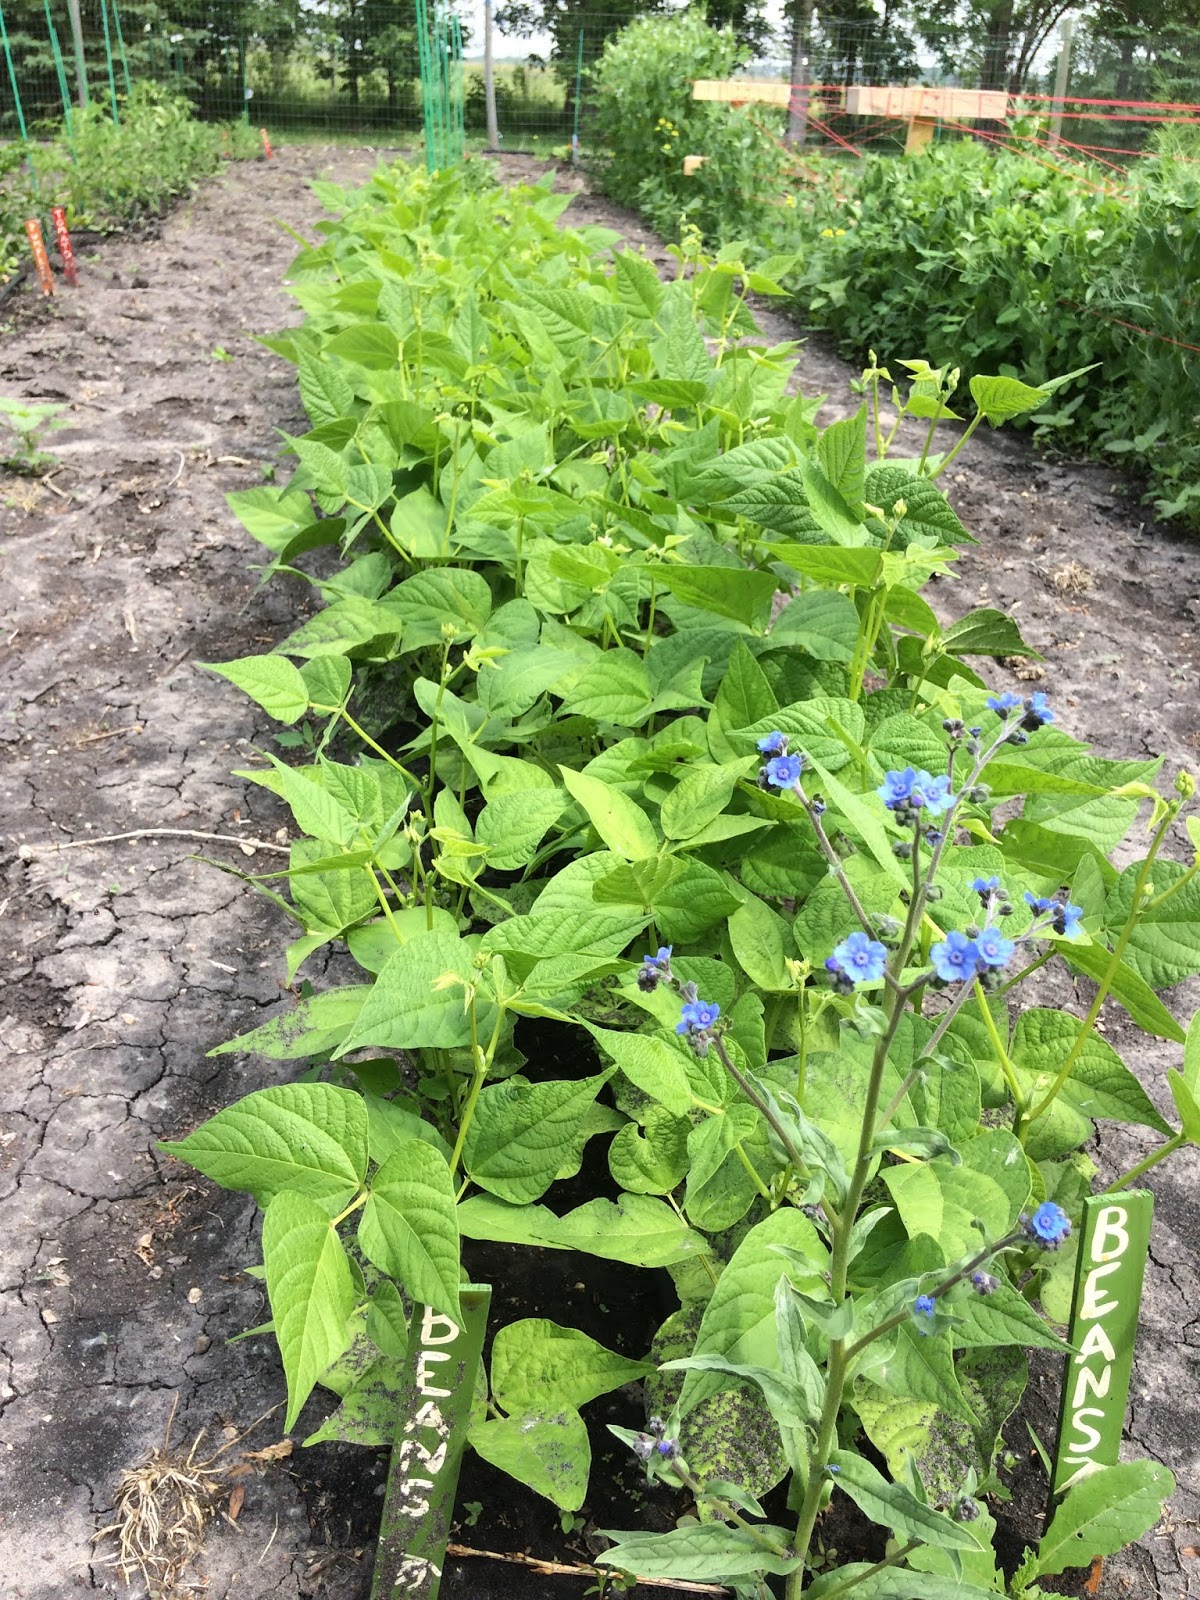
I have two sections of beans, both doing well. In the front with the blue flowers is a forget-me-knot. I planted random flowers for bee-attraction.
my cucumber plants are nicely established. Lots of flowers. I'm hoping the bees will find them quickly! Last year I had to hand-pollinate for the first few weeks using a q-tip. Once the bees find us, it's all good.
The experimental tobacco plants! They are small but healthy! We'll let the experiment continue. Their flowers are quite pretty though!
I think the damp-off stunted my ground-cherries permanently. They really aren't doing much at all yet.
I planted a row of sun-flowers just along the fence (just seeded those last week) And they are starting to sprout! :) again, just for bee-attraction.
My rediculous looking parennial onions. Incase you were wondering where the greenhouse gets those tiny little onion bulbs you use to start onions... check out what the flower looks like on this baby!
My oregano is JUUUUST about ready to flower as you can see. I don't really use it till pizza sauce season, and I'm not too picky on the taste difference between pre-post flowering oregano. Plus with the heat we've had, everything will be flowering early anyways.
And last but not least, Josiah's little garden! His flowers aren't flowering yet, but his cherry tomato and onion plants are both doing very well! :)
Well, that's all for this time! Until next time, keep those thumbs green, and have fun working on those gardening tan lines! :)