Tuesday, 21 July 2020

Mid-summer update!

WOWZERS I haven't written on here in a while. It seems my year-off of blogging really ruined me for regular posting. Haha! Well, since my last post, a lot has happened... Namely a Pandemic and such.... but you already know about all that!

Thankfully, i'm an early starter on the gardening front so I had already fully stocked up on dirt, pots, seeds, etc... everything I needed to start seedlings early this year! So I was all set with my quarantine hobby of starting my seedlings ahead of time!

For today's post, I'm simply gonna share some snapshots from around the yard, and chat about them! This is where things are at over here!

Perennial Garden:
This is Hyssop. It's been in my perennial garden for about 3 years now, and I started from seed indoors. The bees love it, and it can be used herbally for anything in the mint/lavendar palette of flavors.

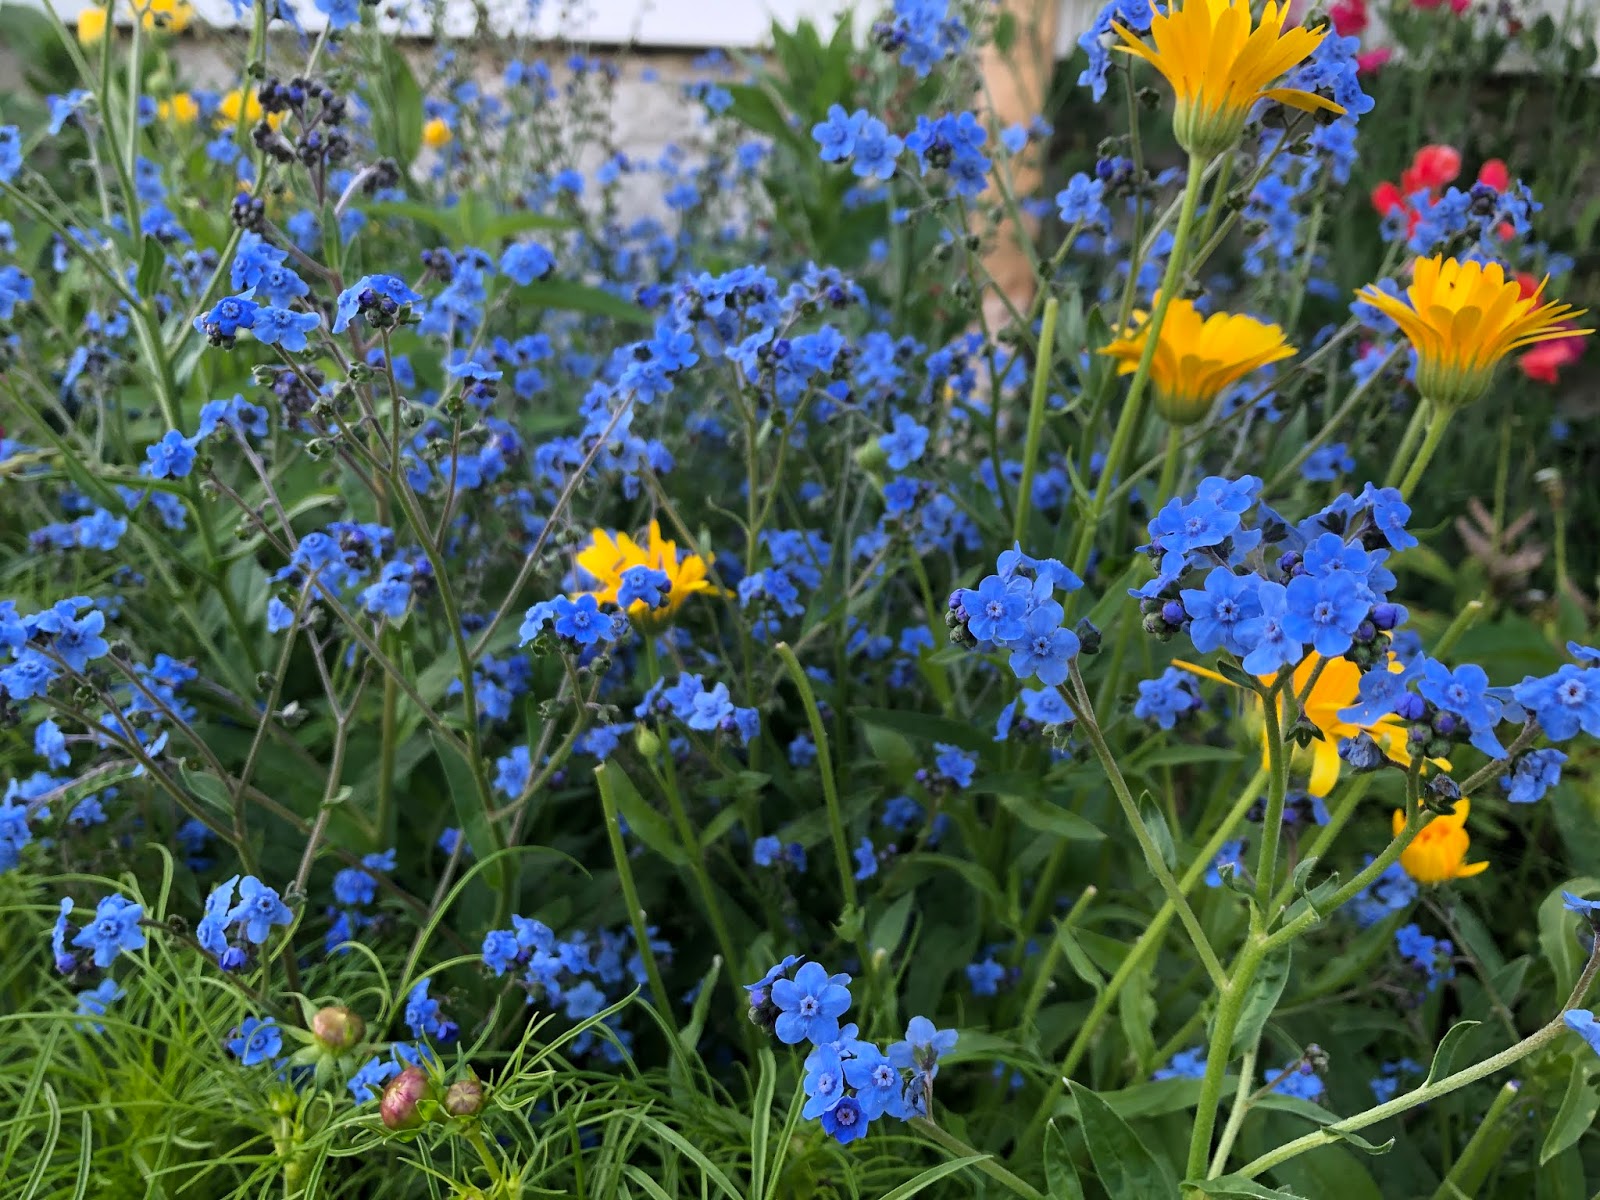
the small blue flowers are Forget Me Nots. They have been coming up as volunteers for two years already, after I seeded them three years ago. Another favorite of the bees. They are showy, but short lived. So I tend to pull them out after they are finished blooming. Still, seeds seem to find their way into the soil for the next year!

At the end of June, I threw some cosmos seeds into the soil in the perennial garden, and now they are all coming up and flowering beautifully! I'm realizing more and more, just how many flowers can be direct-sewn in the ground instead of starting them early indoors.

My Heliopsis is as big and lovely as ever! I cage it in a tomato cage early on in the season to help it not to fall over. The plant gets very tall. 5-6 feet tall! The tomato cage completely disappears in all the foliage but it provides much needed support. These are one of my personal favorites in the perennial garden because they bloom from early summer all they way into heavy frosts in the fall.

These cute tiny daisy-like flowers are actually german chamomile. The plants get about 2.5 feet tall and the flowers look like daisies for quite a while before they lose their petals. A favorite of those teeny tiny bees.

Another direct-sew pleasant surprise were the batchelor buttons. I LOVE how these look with their foliage. It's alike a whimsical row of green with pompomps on top. very fun, and i'll definitely be planting them again in the future!

well, after 3 years of trying to have hollyhocks, i FINALLY HAVE HOLLYHOCKS!! If at first you don't succeed, try try again! :) I'm  very pleased with them, and I hope it's the first year of many!

This is the first year I have done sweetpeas. They are very cute and fun, and they dont take up much realestate in the soil, since they trellace upwardes. Another direct-sew seed i'll be doing again in future.


FLOWER POTS:

I have two sets of flower pots this year. The black plastic ones are surrounding the sandbox this year (simply because they had to be in full sun based on what plants I started this year! haha!).  The big wooden barrels continue to live on our front steps, where they have always been.

These Plastic pails I got from Schreimers for 20-30 dollars each. Very reasonably priced. We laid styrofoam pieces in the bottom half and then filled the rest with a good potting soil. This year I tried something new. An ornamental pink corn is what is shooting up in the centre. The front is nasturtiums, which I planted as a bait crop for flea beetle, in hopes that I could grow some brassicas this year (Cabbage, broccoli, spinach etc...)...Sadly our property has too many of them to make a difference... none of my brassica seeds even made it above the soil this year for me to try and keep the pests at bay! But the nasturtiums are doing lovely, and I am spraying them regularly with a mixture of dishsoap, water, and Neem oil (which is supposed to make the buggars not want to eat or mate, and therfore die off naturally). In the back of the planters, is some petunias I started from seed indoors.
The flower barrels on the front steps are filled with zinnias, petunias, snap dragons, alyssum and that pink corn (which never took in them). Nothing is from the greenhouse this year.  I started everything myself! :)
 Overflow Perennial garden:

Yup! You read that right, last summer I made a second perennial bed! It's just small and its semi-shaded, next to are shed, close to the fire pit. In this one I have a few fun things. Some Hydrengias that I bought from schreimers last year in July, and then a few random gifted perennials from someone off the Manitoba Gardeners facebook page. Purple and white veronica,  Goldenrod, blooming onions, and perennial geraniums.

to the right is the snowball hydrengias. To the centre is the perennial geraniums which are finished flowering. They have beautiful pink and purple flowers when they are in season! Left of those is the purple veronica. The white bits arent flowering yet. And to the far left is the Goldenrod.


a close up of the Goldenrod.


THE VEGGIE PATCH!
This year I did 6 rows, and my Aunt Rita is doing 3 rows. This helps me to not over-extend myself (since I still have a wild and crazy 1.5 year old to chase after along with my other boys). It also helps to keep the whole garden well worked, and nicely weeded when the space is shared!


Here you can see most of my personal rows in the garden. Front and centre is the pumpkins. the next row is tomatoes, followed by other rows of various garden plants.

Lots of blooms ,lots of bees, but no pumpkins just yet!

The cucumber plants are loaded with blooms, and theres the odd cucumber here and there, but it's certainly not cucumber season yet over here.

I've harvested about 3 cups worth of green beans from my row, which isn't a whole lot,but I did plant significantly less plants than I usually do.

My pepper plants have looked underwhelming all season. but despite their appearances, they sure have been putting out a good yield! I've harvested peppers twice already, with dozens of sweet peppers and about 10 jalapenos already, when only picking the red ones! PLenty more green ones still on the plants. I started my peppers early indoors, and it's certainly paid off.

The Zucchini plants are looking healthy, but no zucchinis to report yet.

its difficult to say if my beets are doing well or not... The joys of root crops! The leaves certainly aren't as big as they sometimes are, but they are also planted in the fence-row, which tends to be a poorer growing area. I'm not certain why, perhaps it's because the grass roots tend to creep in and choke things out? who knows.

all of this volunteer cilantro is already bolting and flowering... oh well, it's very pretty and the onions don't mind!

Here is a section where I tried to plant kohlrabi... none even sprouted despite two plantings, one of which was well before the frost date, and should have grown no problem... Instead I have a few carrots growing, some marigolds, and some volunteer chamomile and borage.

Borage is a medicinal herb that also is super attractive to bees. I planted it two summers ago, and i get volunteers ever since then. I love to let it come up anywhere it wont be a nuisance. and as you can see by the photo, the bees dont mind that I let it be!

while everyone else's basil is bolting and finished, mine is just beginning. I plant it from seed instead of plants. This way it's ready to use at the same time as my tomatoes! :)

All of this dill, like the cilantro is volunteered for me. The flowers will be fully mature just as the cucumbers are ready to use. A perfect recipe for pickles! Too bad I only planted slicing cucumbers this year.


I was fortunate to be able to snag some milkweed from a friend who lives near our place. I stuck it in the garden for lack of a better place to put it, and it appears to have taken just fine! When it becomes a nuisance, i'll find it a better home. but till then, Grow and multiply little butterfly magnet! :)


Fruit!:

Well, I'll spare you photos of the berry patch... lets just say its a big rectangle of thistles... we really ahve neglected it badly this summer. Despite the neglect, our raspberry bushes have held their own quite well and are producing bountifully this summer! Our saskatoon bushes got winter kill this winter, and nothing came up sadly... and the strawberries are just choked out by the thistles... we will have to start fresh next summer with them I fear.

the chokecherry tree is LOADED with berries this year. More than I will know what to do with! Jam anyone!?


we have 3 apple trees, in their 3-4'th summer now... this one has about 4-5 apples on it, despite being loaded in blooms. A farming friend of ours let me know that you don't actually want a young tree to have a high yielding harvest as it isnt good for the growth of the tree. So although we covered these trees through several spring frosts, we did let them catch one frost when they were in full bloom... this killed off most of the blooms so we didnt have a huge production of apples.

This is the tree that Kaiser attacked when we first brought it home in it's pot... thats why its such a funny shape still... but it's healed well, and its got about 6-8 apples on it!

This one, is the healthiest looking of all 3 apple trees. But it has yet to even produce flowers in the spring, let alone apples. I'm told this is actually normal, and that fruit trees ought to be 7 years old from the time of grafting, before baring fruit... we planted it 3 years ago, so I would asume it's maybe 5 years old or something like that... We will be patient with it. If nothing else, it's a very pretty tree!


Well, that's it for today! Thanks for popping by and visiting! What do you want me to blog about next? feel free to leave me a comment or email and give me suggestions! :) Until next time, keep those thumbs green! 

Tuesday, 4 February 2020

In a PINCH!


 Hello my fellow green thumbs! (and prospective green thumbs!). Sorry I skipped a week or two of posting. My seedlings grew and I've transplanted most of them into pots, and now they've grown even more!

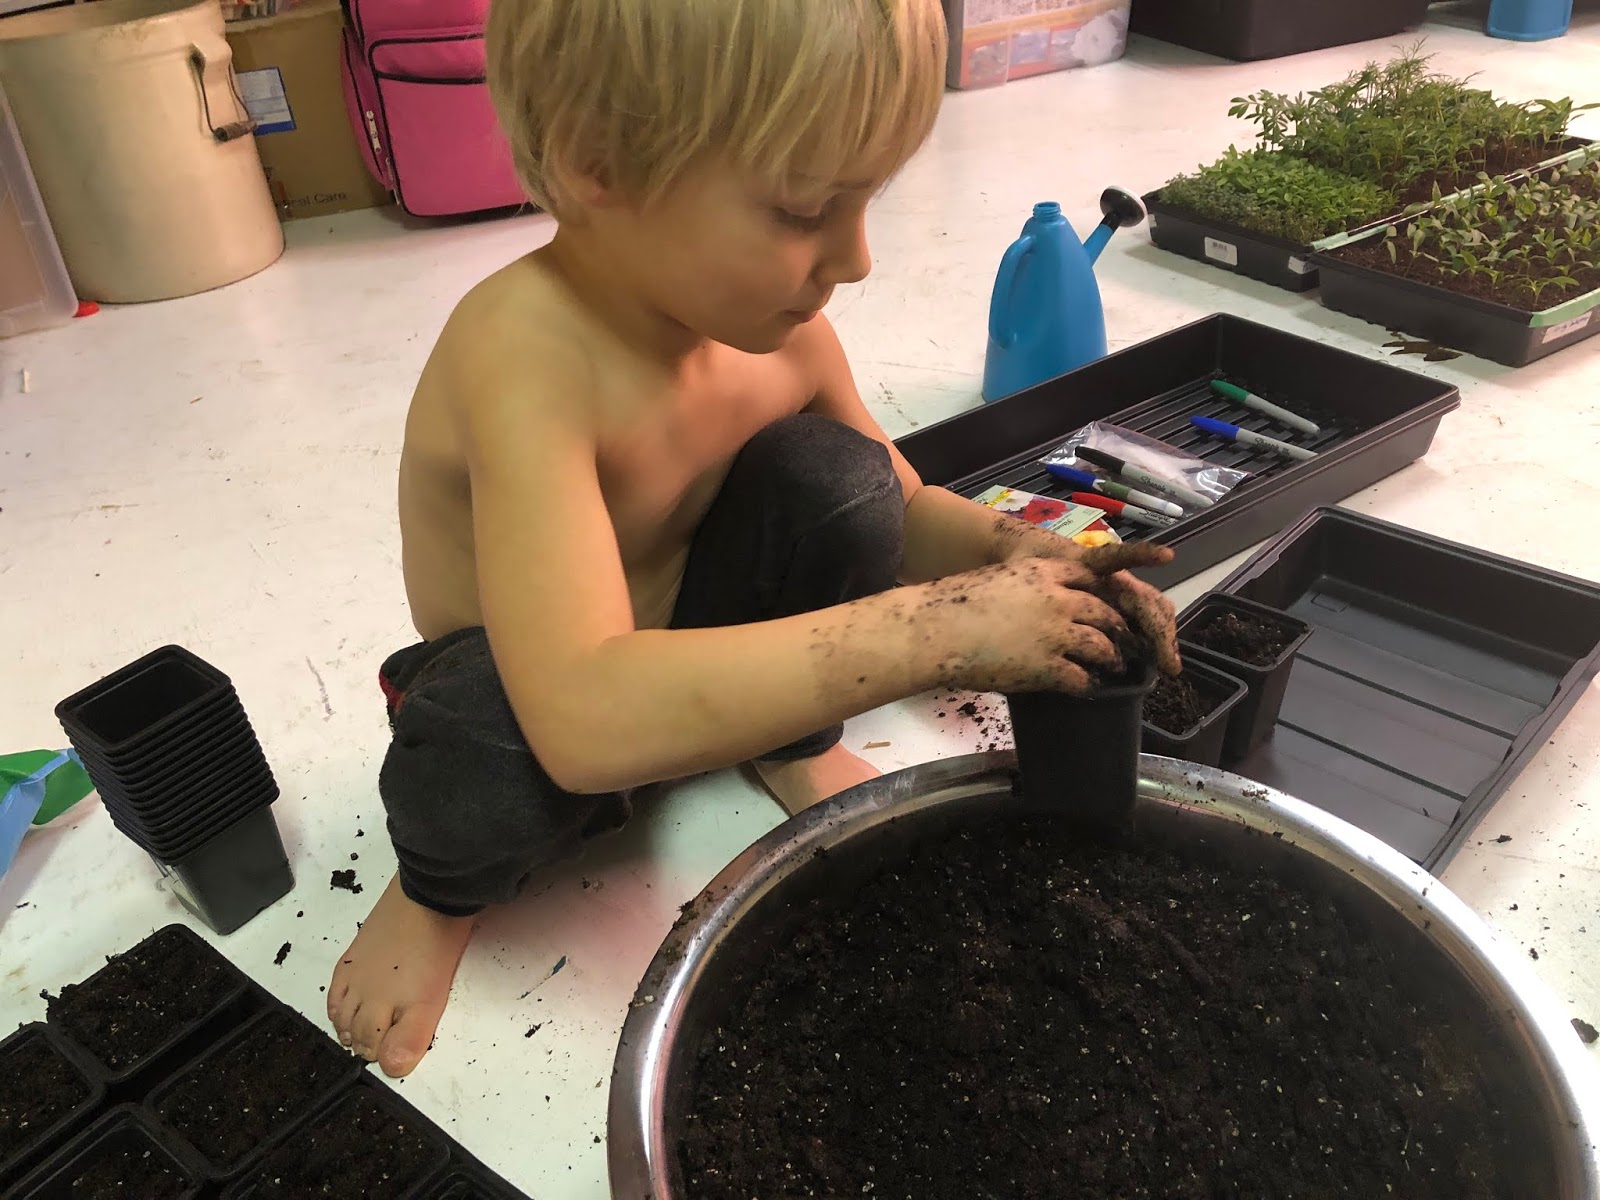
 I had a little helper, which was fun. He helped me massage the water into the soil (I always water the dirt not the transplants. This gives everything an even watering, and ensures that there's actually the right amount of dirt in the pots... no shrinking of dirt!
 I always marvel at just how much more room the plants take up after transplanting! But the reality is, as inconvenient as the larger space is, the plants grow so much better and bigger as a result.

 Here is a prime example of just how much bigger the plants get... add about an extra 1/2 to that realistically, as I ended up just pulling out the cosmos. They were already so big and I decided I don't have enough space for them, once I factor in tomatoes and peppers.  Its a LOT more space, and that's just the first transplant...

MOVING ON!! :)

Today I wanted to talk about pinching seedlings! :)  It's a love-hate thing... It kinda hurts inside to prune a tiny seedling, because youre so proud of it's growth... but the reality is, it'll grow into a much fuller, more productive plant, if you train it to be a little bit more bushy... here's how it works...

remember the disney movie Herculese, when he's fighting the dragon? What happens when he slices off the dragon's head?
Image result for hercules dragon fight"
It grew 3 more heads in the same place! What happened when he cut off those heads?
Image result for hercules dragon fight"


Lets just say, it wasn't pretty... haha!

Well, it's honestly the same principle with pruning your plants! You want to cut off their heads, and instead of just one head, it'll grow 2 new ones! So when you do this near the beginning of the plant's life, you end up with a "double plant" so to speak... instead of growing itself in one spike in one pattern, it will grow itself in two spikes in two patterns... if you prune again later, then it'll again produce two branches instead of one at that intersection!

Here... let me explain using Penny the Pointlessly Protected house plant...
Here's penny a few weeks ago when I chopped off her head...

And here's Penny today

Do you see them? do you see right below the cut-line, how the plant has adapted to it's horrors? instead of just deciding to be done growing, it grows twice as well... Penny is now growing into a two-headed pointlessly protected house plant! :)

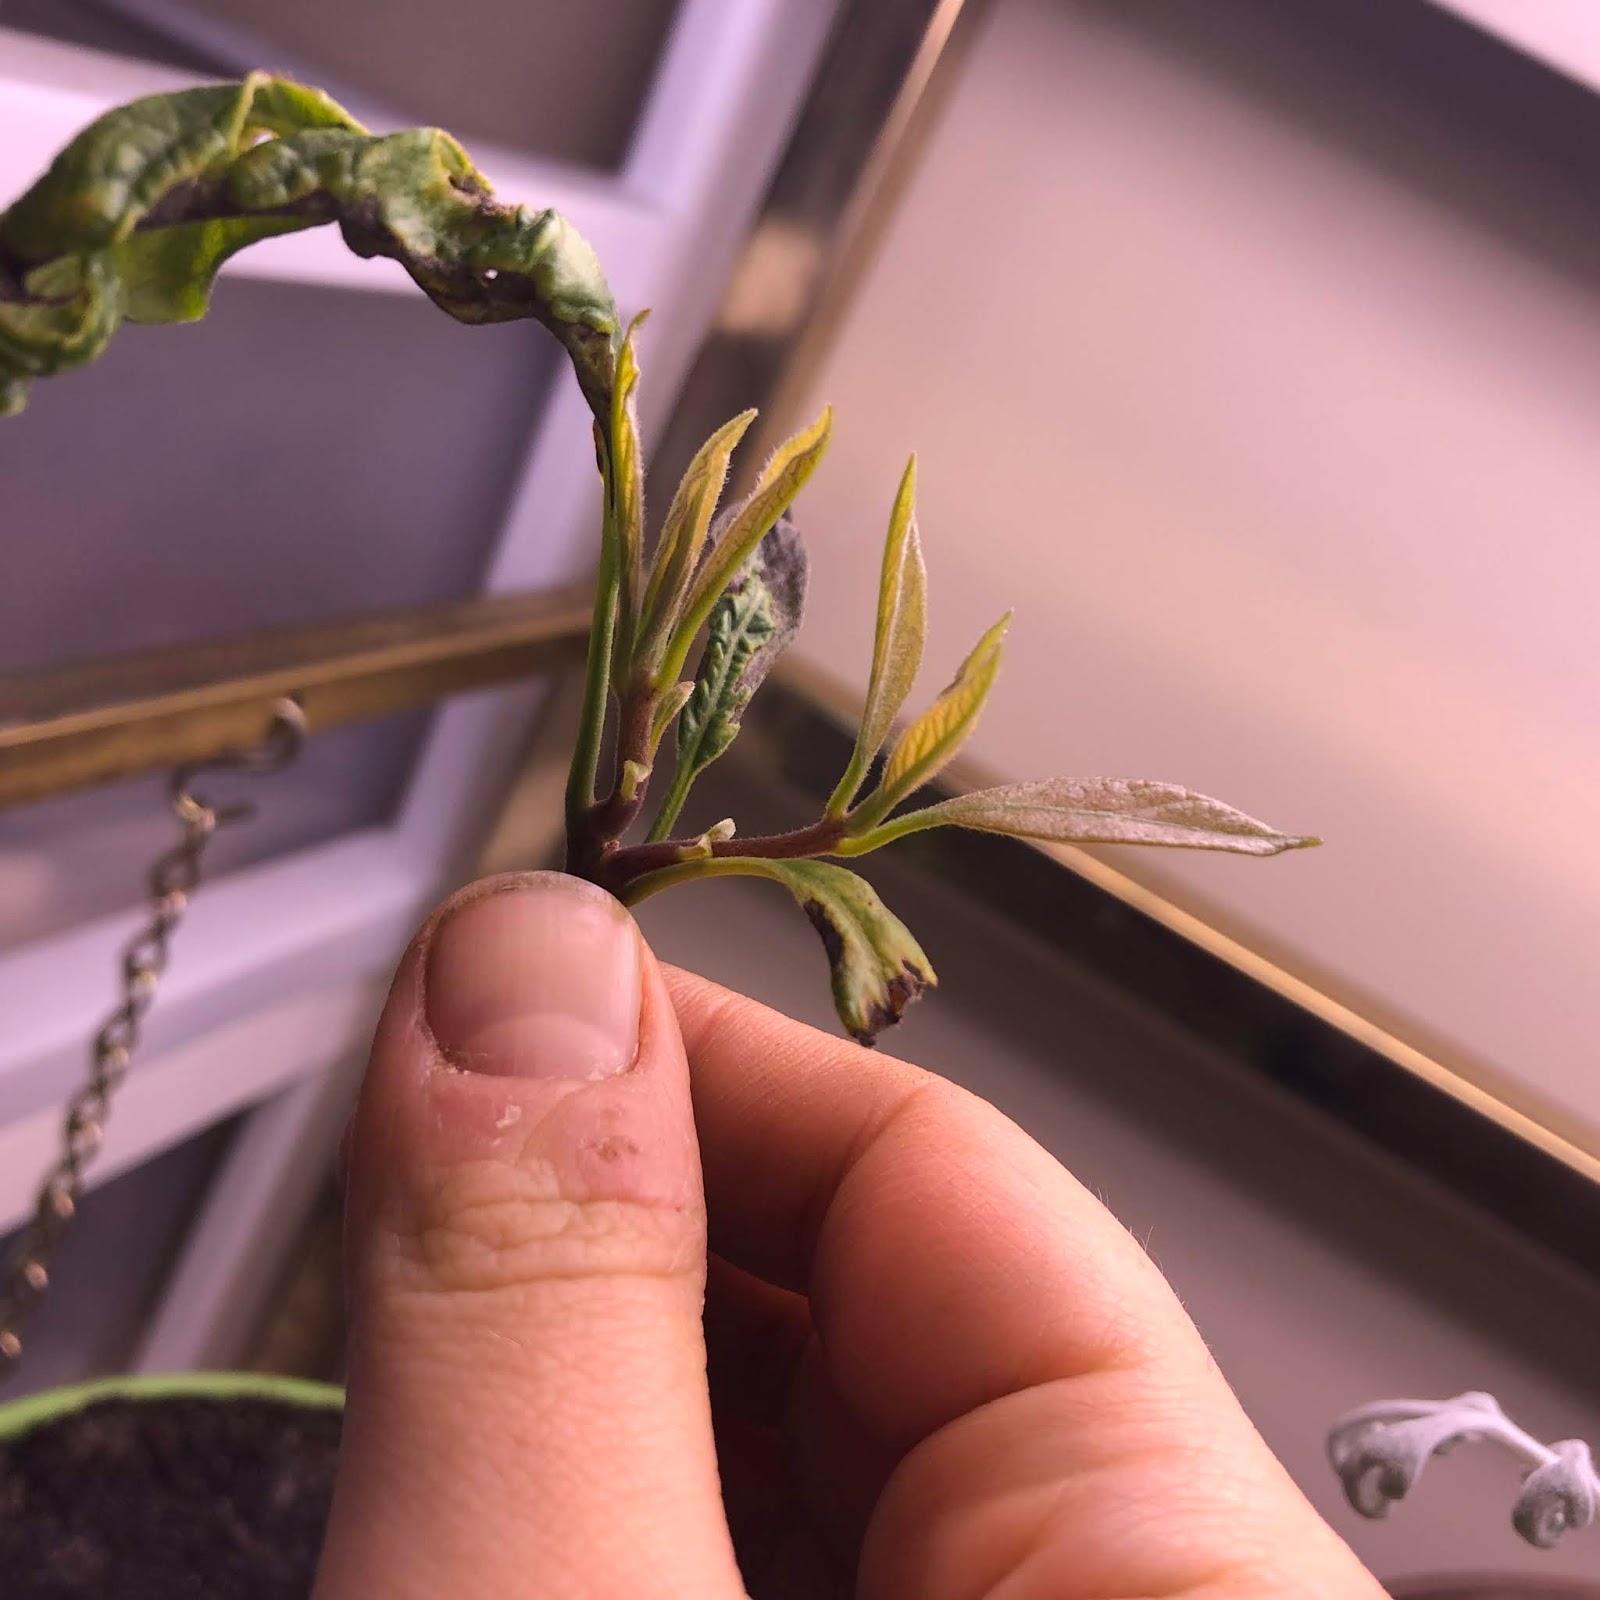
Here's another example... My avocado seed! (this one was a tough one to pinch...)


Here she is after I pinched off her beautiful big upper leaves.... Sigh!

And here she is now! (ignore the fact that the original 3 leaves have all gotten horribly sunburnt from me having her too close to a hotter bulb).  She's got a full two stems with 3-4 leaves each! I will pinch her again once each head makes a second set of leaves. Avocados are notoriously leggy and sparse. So it'll need a lot of TLC.

WHAT TOOLS DO YOU USE KRYSTA?! THIS IS AMAZING!
This is the part where other bloggers reccomend an expensive product to you, and someone pays them to endorse said product...

Some people like to use tools, but honestly...
I prefer to simply use my fingers! I have a good reason for it... with such small seedlings, scissors or shears are just too big. you can accidentally snip off more than you plan to. And if you have a seedling with NO leaves, chances are it will die because it cant photosynthesize light. It needs some solar panels! :)
So today I pinched a few different plants. Here's my Marigold's before pinching (above) and after (below)
It's not a huge difference in the appearance yet... maybe I could've pinched more, who knows! (I guess a master-gardener might know...)

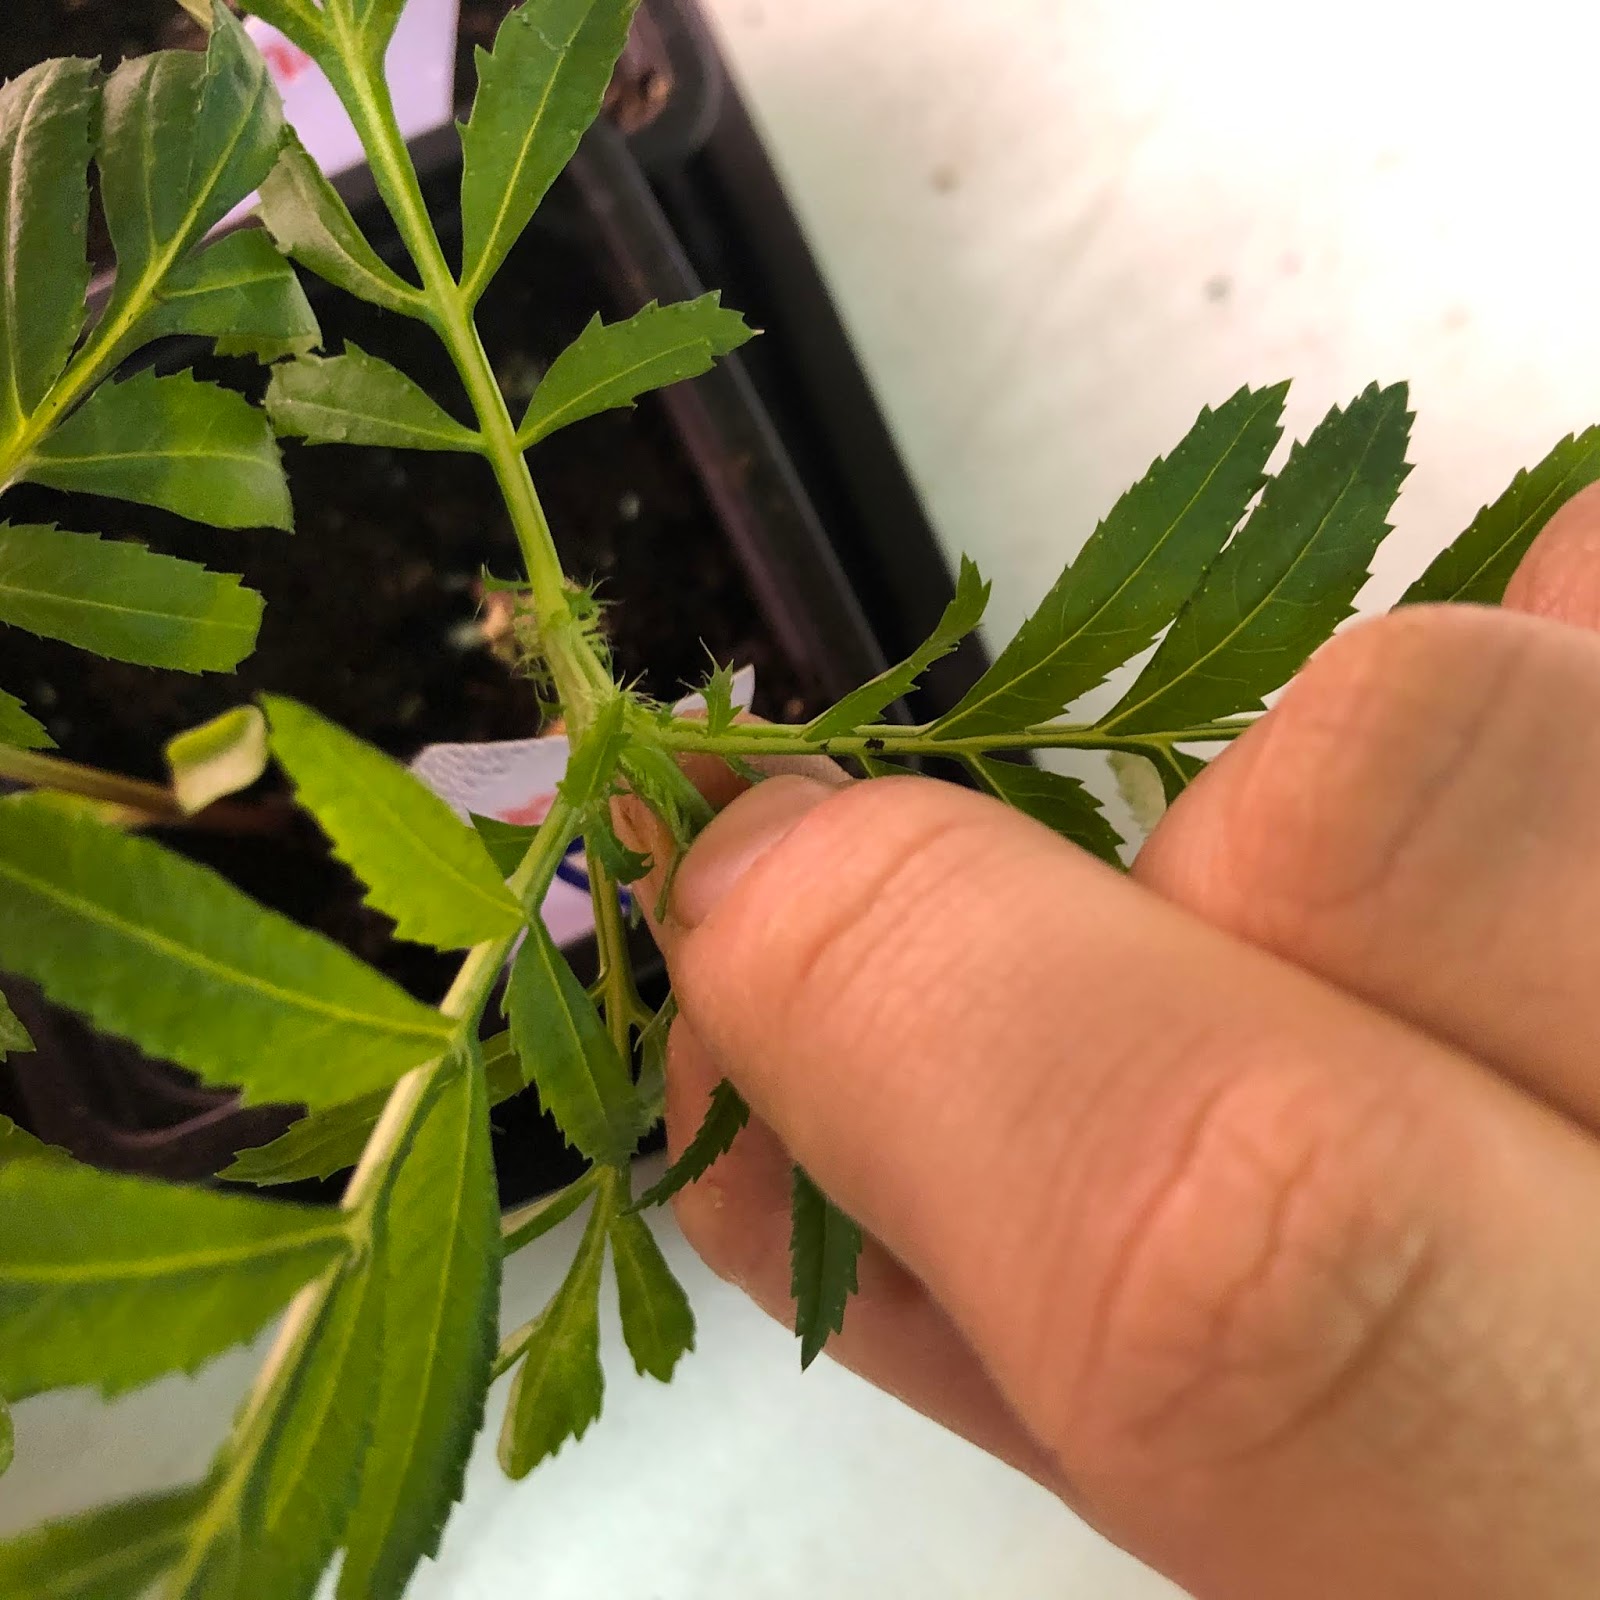
First, make sure your plant has enough leaves that you can actually pinch a significant portion without ruining the plant. I like to wait for the third set of "true" leaves (not the initial seed leaves, but the properly shaped leaves) to be out and established. Find that third set, and plant your fingernails on the stem beneath their leaves... you're not just giving the leaves a hair cut, you're removing the joint that attaches them to the stem.


above you can see I removed the entire leaves, but missed the base part of the stem where they are attached. I went in a second time and squeezed off that little joint part.


there. Now the only joint you can see is the one between the second set of true leaves. you can also see the iddy bitty baby leaves inside that joint. If I didn't pinch it, those leaves would remain tiny... But now that i've pinched it, those will grow into full sized leaves, and branch out each into their own chunk of a plant.


Thyme, basil and oregano... herbs and things that grow in clusters... They are a bit simpler. Wait till there's several sets of leaves, and just go in with a scissors and give the entire thing a chop.

 There's still plenty of leaves for the plants to photosynthesize, and weaker sprouts may die off (which we want) and the bush should get bushier instead of taller! :)

 Plus now I have a bit of thyme to cook with!

The alyssum was a little trickier... mainly  cause it's not totally ready to be pruned... so I just went in and pinched bigger sprouts, in the same way I did the marigolds.

Again, directly at the base of the stem you can see little points where baby leaf buds are waiting and ready to grow if they need to! My guess is that this is God's built in defenses against hungry wildlife having a meal at the first signs of spring.


in other news, the petunias and snapdragons that I seeded have sprouted! So there will be more transplanting and pruning in the weeks to come! I'm trying to hold off on tomato plants for a month yet, so they don't get too unruly.

Well, that's it for now folks, thanks for reading! Happy pinching!