Tuesday 29 May 2018

Setting out the garden!

It has been a little while since I've written in here! I'll be totally honest, I had to unplug for a while. I'm removing the 3 biggest time-killers from my life (Facebook, Pinterest, and Instagram) for the in-determinant future. I make my kids un-plug during the summer as well, so I should follow suit! :) But I'll keep on blogging for now! The joys of not blogging for sponsorships, is that I can do this on my own timing.

So despite the lack-of-posting, plenty has been going on!


In this post, I'll attempt to give you a start-to-finish cole's notes on how I set out my garden this year! I'll do follow up posts on specific veggies, such as tomatoes and cucumbers, and my detailed process on those. But for now, just the process itself.

STEP 1:  TILLING!
 When we moved into our place, August 2016, the garden wasn't used that year. The people living here previously, had just had a baby, and didn't have the time necessary. As a result, there were 5 foot tall thistles throughout the entire garden! EEP!! My plan that year had been to use roundup and kill them all. However, Curtis decided to mow them before we could talk! ACK! So last year's gardening was the battle of the thistles. I did use round up. What I did was use sprinklers in the spring time to water the soil and encourage the thistles to come-forth from their dormancy. When they were up, I went in mercilessly with round up. Once those all died off, we tilled the garden. Then, I watered it a second time, encouraging the strong stragglers to sprout. Again, I rounded them up! after those had died off, we tilled a second time, and then It was planting time by about early-middle June last year.

So suffice to say, we are now pretty adamant about tilling the soil! We tilled it in the fall after the season was over, and again in the spring time before planting. This needed to happen before I could even plan out my garden.


STEP 2: MEASURE  YOUR ROWS!

You may be thinking that drawing up your garden plan is next. but actually it's not! One method of row-gardening is a "tiller garden". This means you leave enough space between your rows, that you can use the tiller to do most of your weeding for you. Our garden is plenty large enough to use this method and still grow much more than we need to.
 In my case, I made my rows 5.5 feet apart. Our push-tiller is about 30 inches wide, plus a 3 foot allowance of space for the actual plants as they grow. No one wants to accidentally till their plants down!! :(

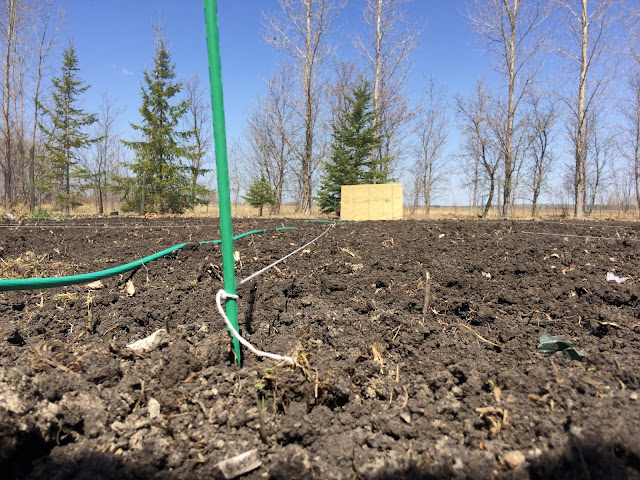
I used my tomato stakes and some leftover crochetting yarn for these temporary row markers. Staking and measuring at both ends of the garden ensures straight rows. Not necessary if you are hand-weeding, but when using a tiller, its good to be somewhat geometric ;)


STEP 3: PLAN IT ALL OUT!

NOW we get to the fun stuff. Now that the rows are all measured out, I have a better idea of exactly how many rows I have to work with. This helps me distribute and plan out where I put things.

It's also a good idea to draw it out ahead of time, in case your plant-labels blow away. Then you still know what you planted where.

This year my garden is a bit dis-jointed, because I am trying to rotate the locations of the things I grew, from last year. In addition to crop-rotation, I'm also trying to abide slightly by a companion planting method as well. I don't stick to this too closely. but mostly I look out for plants that really DON'T get along well next to each other, so I don't sabotage my own gardening efforts.


Once I had it drawn out, I actually laminated it so I could scribble on it with dry-erase markers. This helped me to time out my planting efforts! Last year, because I had to start so late in the season, I did everything in a matter of two days. This year I spread it all out over 3 weeks, and I'm glad I did so! In the above pictures, you'll notice blue lines. These are the seeded items I was planting 1-2 weeks before our last-frost date. Lettuce, kale, spinach, kohlrabi, herb seeds, onions etc... Having a plan made it much easier to know what I was doing!

STEP 4: GET PLANTING!
 After that, it's pretty much just timing and elbow grease! You may recall my previous post about plant labels. This is when they come in very handy! A pretty spark of color labeling where things are. It gives the garden a nice look even before anything is up out of the ground!

 I made special labels for my grow-a-row for Winnipeg harvest. You  can too! Grow  a row to donate to those in need!

 Tada! Seeds planted! At this point I could still just walk all over dragging the hose where I pleased. But once things start sprouting, that is not okay. So there's still more work to be done!

This is my basil starting to sprout up! I don't buy plants for basil, as it grows very well from seed, so long as you have some patience to wait for basil in july! :)

STEP 5: PLANTING SEEDLINGS!
So most seedlings, it's recommended to wait 1-2 weeks after your frost date to plant them. This year has been very unique in our hot temperatures, so you could have had them in the ground well before the frost date even! But because I kept to schedule, and it's a big garden, I did wait till respective dates passed.  My only tip right now to get you going, is to use your hands and build a mote-wall around each of your seedlings to help them retain their watering, instead of having the water run off down the mound! This  can be a real plant-saver especially on the scorching hot days we've been having this spring!

 This year I'm doing 55 tomato plants! I'm trying several different varieties. So my hope is to do plenty of fresh eating, as well as canning (and of course, giving away! cause that's over half the fun of growing a big garden, is being generous with it!)
 I did half a row of cucumbers last year, and found I wasn't as generous as I'd liked to have been because we were using them all. So this year it's a full row! :) about 7 or 8 varieties as well, all properly marked!

For peppers this year I did jalapenos, green peppers, and something called "weaver's Mennonite stuffing pepper" which I think of as the "cherry tomato" of the peppers family. Small bell peppers that you can either eat fresh or stuff and cook. It should be fun if they grow!
STEP 6: WRITE IT ALL DOWN!

This is something I harp on a lot. DOCUMENTATION FOLKS!! I went around my garden and mapped out each tomato, pepper and cucumber plant, labeling their specific varieties. Because the little plastic plant labels will wash away, sun bleach or blow away, or simply get covered by the plants themselves. This is HUGELY important if you want to be educated in what variety to grow next year. Or to know which kinds are susceptible to diseases in your garden, which ones ripen faster in your micro-climate, which ones get pests etc... so many useful things to know when you can be informed! :)
 STEP 7: WATER WATER WATER!
 Remeber that seeds need to stay wet in order to germinate properly! I'm currently watering DAILY! and on some of the hotter days, morning and night, on areas where seeds haven't sprouted yet. Once you break a seed's dormancy, you need to keep it moist until it germinates and you see a seedling emerging. After that, you can back off to 2-3 times a week, or as you see fit. But that period of germination is crucial to keep those suckers wet!

Also, keeping your seedling plants like peppers, cucumbers and tomatoes wet, until they establish themselves. I'd say about 3-6 days of daily watering, or until they stop looking wilty, and then you can back-off to a regular watering routine..


The last thing I'll mention, is the additions to my garden thanks to Curtis. You'll notice some wooden posts. Those are in my rows of peas. These will get twine wrapped between them to create a make-shift trellis for dirt-cheap! I also had him pound in some stakes at each row's end for me to hook the hose around! This enables me to water my plants and not run any of them over with the garden hose! :)

AND THAT'S ALL FOLKS! here's a couple snapshots of my garden from this morning. Lots of stuff is up, including plenty of weeds... :( i've already weeded out thistles once, and there's so much grass seed weeds you'd think I actually planted grass! Sigh! Gonna be work again I guess! But where's the reward in  gardening, if you don't have to work at it.

Thursday 17 May 2018

Re-claiming the flower garden

Sigh! I'm pretty sure it's one of the ugliest sites for a gardener... to see a flower bed directly after the snow thaws... especially if you never got it cleaned out in the fall! Just dead plants, likely some garbage blown in... and then a few weeks later, despite the deadness of everything else, the plethora of weeds that seem to just KNOW where they are not wanted! They start popping up right along with those blessed perennials.
 
You might remember this photo from my "at war with the dog" post! But now you can admire all the glory of my post-winter flower bed. :( dead plants still lingering, brown grass all around, and yet thick lush green grass and dandelions in the flower bed! fluff from various stuffies of Kaiser's (our dog), random garbage that gets caught up in there... and my milk jugs of course! (update on those yet to come!)

SO what do you do!? If your adhd is as bad as mine, your first thought is to toss some grass seed on it and just give up, and stick some pots on the ground instead! But no... as I am slowly learning in life, taking steps, however small, still moves you forward. So I took steps!

1) RAKE IT OUT!! Yup. that'll get rid of most of the junk. Break off dead stems. They've already separated from parenneals, so they wont dammage any roots. And then Just have-at'er with a leaf rake.


See? Much better! All the dead plants from last year are no longer around, the fuzzies and garbage also gone.  In fact, it looks like a nicer lawn then our ACTUAL lawn does... sigh! Problem number 2! Perennial grasses! Ever heard of the expression "grassroots organization"? This expression only makes sense after trying to remove the root system of a grass plant from a garden bed. It's next to impossible... seriousely... and even if you get it all, there's always one tap-root you don't get, and that's enough to bring the whole plant back... great for the lawn, not so great for a garden...

So, as any good all-natural organic gardener would do... I turned to Round-up...

lol yup! I'm really not all that naturalistic... I mean, I am when I can! But sometimes it's just not in the cards! And when that's the case, I just sigh a sigh of relief that someone has invented something I can use! Throw on some gloves, long pants, and wait for a non-windy day. Lets remember that this isn't a food garden... So round-up matters a lot less here. Plus it doesn't touch the plants I am keeping, and Round-up neutralizes when it hits the soil. So it wont kill any future plants, only the plants it touches!  After that, it's harmless. So long as you understand what you're working with, and are careful, it's all good! :)
 
 So I set to work, and sprayed round-up all over! The trick is to cover up any perenneals that have sprouted, using ice cream pails and boxes (things you can throw away afterwards because they'll get round-up on them). If you don't have any perennials in there... HECK JUST RE-TILL THE BED! you don't need this post! ;)

Anyway, this photo was taken probably a week after the round-up was applied. (important: after round-up is applied, check daily that your dandelions arent seeding!! Dead-head those suckers if they turn white!!) You can see it was very effective on the grasses, my perennials are just dandy, and the dandelions have lightened in color but still are thriving. At this point, I again covered my Perennials, and went in with round-up a second time.

The beauty of round up is that it kills the root systems themselves if you can spray all the leaves of a plant. I usually also spritz a bit of the surrounding grass at the edges of the flower bed, since there's a very good chance the root systems are connected. It's never affected my lawn, since grass is an incredibly vigorous plant... for better and worse haha!
so several days after round two of the Round-up, you can see the rest of the weeds are suffering, and the grasses are just flat-out done... :) hazzah! On to phase 3 of my evil plan!!
 this... right here... is my secret weapon! It's a hand-tiller y'alls! you just plunge it into the soil and twist. The beauty of this tool is that it's easier than a shovel, and you can work in small areas (AKA around your perennials) without dammaging other plants! :) Yay!


This dirt was also remarkably easy to till simply because of how dry it was. I didn't even attempt to pull the weeds first. I tilled first. Loosening the soil, means that I'll be able to pull out the entire root of a plant as opposed to just the leaves.
 you can see the difference above and below, what a nice little till does to the flower bed, and to the weeds.

after about two hours of working the soil, I managed to get it all tilled up!
Next came the hard part. Weeding it all! Goodness I detest grass roots... so pesky! And just everywhere. Tilling enabled me to get into the dirt up to my elbows and really dig for roots! There's no sense pulling leaves off of weeds. It's the root you need to get rid of!
Not bad eh? Now you can tell where my Perennials are!  I have two sedums, one on each end, two hostas (the little green spits that look like a weed popping up), in the centre is something like a black-eyed susan, and then in front-centre is my white strawberries from last year, which I was told were an annual lol!

Next comes watering. Because no matter how careful you are, you're going to disturb a few roots of the perennials simply from tilling close enough to eliminate weeds. So for their trauma an extra drink.

First though, while the soil is maliable, I created a big crop circle around each plant. A ridged mote of sorts to contain water. This flower bed is not totally level. Water ends up puddling in weird spots. So while I had the time, I simply created my own water-puddling zones, directly surrounding my perennials.
You can see how this encourages the water to remain directly at the roots of the perennial. :)

And there you have it! we went from this:

To this:

 To this!:
A beautiful flower bed, primed and ready for bedding plants, bulbs, seeds, what-have-you! :) Now to do the side garden.... ;)

Monday 14 May 2018

Fires, Feet, and plants... So close, and yet so far! :) + :(

Well our weather has sure been something! Hot and dry. VERY unusual for our spring. Usually we end up with cold and wet... which results in standing water, floods and mosquitoes! But not this year. I'm not sure I like dry any better, since it puts us at risk for forest fires. Especially since last summer was dry, and we didn't get much snow over this past winter. I believe we're officially in a drought. There are burn bans all over. Not just for farmers burning their fields but for private citizens in their own fire pits. I for one, am glad. We live close enough to Bird's Hill Park, that I am slightly unsettled at the idea of a forest fire. It could affect us in a very real way.
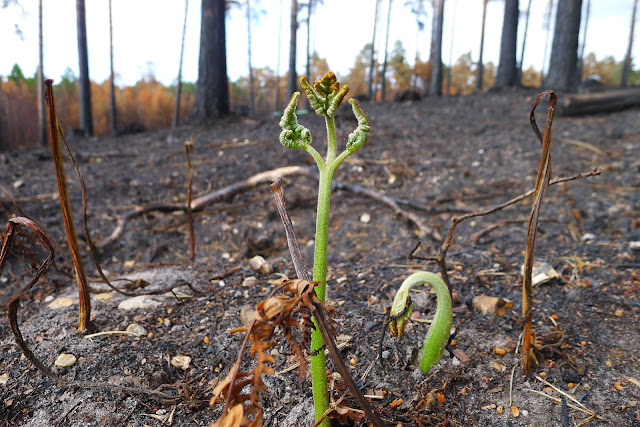
new growth after a forest fire

On the other hand, all of our Manitoba forests are well overdue for a good fire. Fire sounds bad, but forest fires are actually very cleansing for a forest!


New growth after a fire

What happens when a forest goes too long without an occasional burn, is that dead trees accumulate, not decomposing as fast as preferable. fungus can overgrow, and old trees simply clog up the space, never making room for new growth. Forest fires are actually very good for a forest. They are just horribly dangerous and inconvenient. And unfortunately here in Manitoba we have gotten VERY good at preventing the natural fires from occurring... as a result all of our forests are basically dry matches, waiting for a spark right now... not fun... we have rain in the forecast now at least. Lets hope that continues!! I'm spouting the benefits of forest fires as though I'd like one. I'm genuinely fearful of it happening and hope it doesn't! I can feel my anxiety rise any time I smell smoke in the air. I'm just also aware that there ought to be a natural cycle to the forest... and you need only drive through an inter-lake forest to see for yourself that all the trees are old and haggard. The tornado 2 years ago ripped out a bunch of old ones in some spots, but only in one path... the reality of nature is a bit undeniable at this point.

AND ON THAT HAPPY NOTE! LOL!

Yes, it is garden-foot season already! I swear... I inherited my brother's feet... I don't know how, but I did. There's just nothing I can do about it. As soon as they touch garden soil, my feet literally fall apart like a bonded-leather sofa 2 months past the warranty...  This year, I shall need to invest in proper "gardening shoes" I think. Maybe that'll make a difference! Does anyone else get garden feet, or is it just me!? All winter they are fine. But as soon as they hit the soil, this happens. It's not even from being in flip flops! I don't do that yet! :P Oh well, them's the breaks!

PLANTS FOR GRABS!

various tomato plants, all free for the taking to a good home! Come before Thursday or miss out

Yup! You read that right. You have until Thursday this week to show up and steal some of these tomato plants. After that they are going to mom's group to be snatched up!! :) So come now or miss out. I've selected and transplanted the ones I want to keep, and this is what's leftover. I don't feel the need to care for other people's plants at this point in the season lol! And I can't just toss them in the trash...that's green-thumb heresy!
I thought I'd have extra cucumbers and peppers, but I don't think I do. I may have excess of them and flowers AFTER I've planted everything... we shall see! I can also get rid of some lupines. I have tonnes of those! So just ask! :)

THE OL' UPDATE ON THE PLANTS!
I'll spare you photos of every single tray of plants. Suffice to say all the flowers are slightly more hearty, and larger. No blooms on anything yet, but most greenhouse plants barely have flowers either so I'm not worried at all.
Like I said, I set apart the tomatoes I am keeping. I transplanted them into 1 Litre milk cartons i've been saving up. I have about 55-60 tomato plants for this year! Last year I did 44 which was plenty, but I never really ended up giving any away. And I like to be a generous gardener. So I wanna make my salsa and let others do likewise! :)

My cucumbers are also hardened off. I do lose one or two here and there because I leave them outside on the 5 degree nights. It's still a little cold for them... But again, that's where survival of the fittest comes in! If it's below 5 degrees, then the plants all go into the garage for the night!

Yup! It's exercise Hauling them back and forth! lol!


My peppers... what do I say... they are so so SO SO SOOOOO overdue for a transplant... but at this point i'd have to go out and buy containers, and it's for what...1-2 weeks... it's like... ya they'd be happier, but would the growth be substantial enough to merit the effort? someone feel free to chime in! I'm sure they are just gigantic root balls at this point. But hey! most greenhouse plants are too when you transplant them. Someone tell me what to do here!!!

I bought some succulents from IKEA for my outdoor patio table! Those also need to come in at night still until its at least 10-15 overnight regularely. I just thought they were cute and would make a nice houseplant after summer ends! (And on a little sneak-peek note, I purchased some succulent seeds and sensitive plant seeds from amazon to try out over the winter months! goody goody!)

Here's that sunset that was behind the succulents ;)

 I seeded all my squash just over a week ago, and everything is starting to pop up! :) squash, like cucumbers, do not like having their roots disturbed. This is why their suggested seeding date is quite close to the frost date. You don't want to be transplanting them more than once... into the ground. So these are still under a grow light (they need 10-15 degrees at night, and shouldn't go into the ground until 2 weeks AFTER the frost date).
 The pumpkin seeds are seeds I saved from last year's pumkins! I'd say I'm at about a 25% seed-saver garden rate at this point! :) I'm definitely gonna try saving tomato seeds this year, and I may try a cucumber or two (which requires a lot of forward thinking to accomplish actually)

 Spagetti squash seeds, also seed-saved from last year's garden. :)

 So last fall when Josiah's class went to the corn maze, I purchased two locally grow gourds that were really cute. Funny shaped multi-colored warty things. The kind you display at thanksgiving! Anyways, apparently their seeds sprouted! :) So i'll have to stick those somewhere and see what they do. I might do it in the out-back since I'm getting a bit selfish with my garden space ;)

 Last year my butternut squash didn't do much, then died off. So we shall see what happens. These are seeds from a sobeys butternut squash from the fall (AKA in-season seed saved). So I have no idea if it'll grow! The germination rate wasn't amazing.

The only other thing I can share is that I've been battling with these weeds in my front flower bed! We only tilled in this garden last summer. So it's not in great shape yet. But I have parennials in it, so I can't simply till it up again (unless I first risk the perennials lives to do so). So I took big buckets, covered my perennials, and went in there with a spray bottle of round up. Once these are all more sickly, I'll walk around with my parents hand-tiller (a hand-crank spiky looking thing) and just loosen up the soil and pull out the weeds properly. I have a tonne of gladiolas and dahlias I want to get in here yet!! :) It should be a very pretty garden by mid-summer.

Well, that's all for now! I haven't put anything new in the veggie garden since my last update. I could likely put in all my other seed items at this point, but I've got enough to do. I'll wait till the may-long now! and plants will get put in, 1-2 weeks AFTER may long weekend.